How to Store and Age Cheese

Do you love to try out new and different cheeses? Have you wondered how to store your cheese after opening it? Or would you like to further age your artisan cheese? We’ll show you how to experiment with making a rind or mould ripened cheese.
Please read our blog about how cheese ages, it will give you a good idea what happens during the aging or ripening process.
Storage of cheese
Cheese continues to age. During the aging, bacteria and enzymes are at work breaking down protein and fat, creating flavour and odour. The more water the cheese contains the faster and more intense the process is. A rind or mould will add additional components to the aging and flavour development process. Rind or a mould covered cheese will also ripen faster than a vacuum packed cheese.
When cheese is refrigerated the aging process slows down, especially in the case of hard cheeses (like cheddar) or extra hard cheeses (like Parmesan).
Storage of cheese means that the cheese has already aged and we don’t intend to age it any longer. We either bought it or made it ourselves and are happy with the way it is.
Best practice is to keep cheese in the refrigerator. If you can’t consume it right away, I recommend vacuum packing it. Once the package is open, store it in a resealable package, plastic wrap it, or keep it in a tupperware.
Cheese that is exposed to air will eventually start to mould. It is easy to distinguish edible moulds and bad moulds. All white moulds on cheese are good moulds. It’s possible that any cheese surface can develop a bit of white mould. Just scrape it off, or eat the cheese with it. Black and green molds must be properly removed. Blue moulds can be either edible or non-edible. If a non-blue cheese turns blue, treat it as an unwanted mould. Here’s a basic rule, if you encounter unwanted mould growth on your cheese:
- If the mould appears on an extra hard cheese like parmesan: scrape it off with a knife, the cheese is hard enough to prevent the mold threads from growing into it.
- If the mould appears on the surface of a hard cheese like cheddar, cut a ½ inch off the cheese.
- If the mould appears on the surface of a semi hard cheese like havarti, cut off 1 inch of the cheese below the mould.
- If the mould appears on a soft or fresh cheese, then throw the cheese out. There is a good chance that the mold threads have grown all the way through the cheese.
Mould is the main threat to cheese. Cheese doesn’t go bad, it just keeps aging and can reach a point where the odour gets so strong that we can’t consume it anymore. Manufacturers have to add best before dates because it’s the law. But if your cheese doesn’t develop bad moulds you can easily keep cheese long past the best before date.
Cheese should never be left out in the open, unless it’s in a designated cheese storage room. This is because of flies. Flies love to lay eggs into cheese, which can result in maggots destroying your cheese.
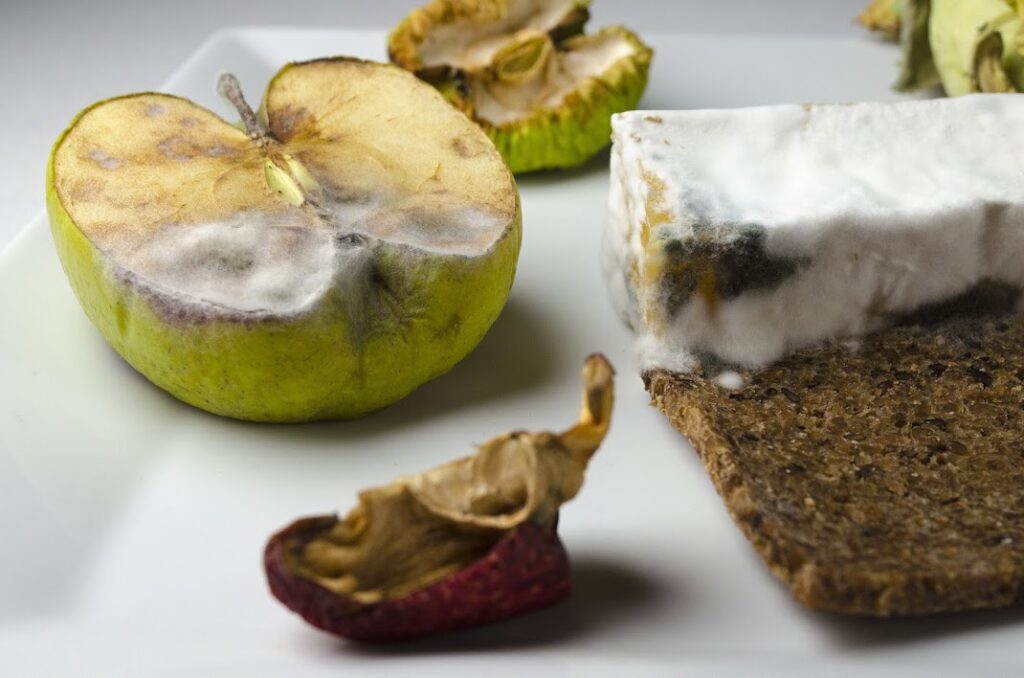
White mould on cheese is okay, but black and green are not and should be properly removed.
Aging of Cheese
If you are a home cheesemaker or a cheese connoisseur, you might want to further age your cheese by leaving it age at room temperature until it has developed the desired taste. The ideal aging temperature for cheese is around 15 C/ 59 F, but you can definitely age your cheese at regular room temperature. The higher the temperature the faster the aging will happen.There are basically 4 ways to do so:
- Vacuum packing: This will protect your cheese from mould growth. It is a low labour aging.
- Waxing the cheese. Waxing has the same effect as vacuum packing, it just looks more appealing and avoids the use of plastic.
- Rind ripening: A rind can be developed on any cheese that is firm enough to be “washed”.
- Mould ripening: Specific edible mould spores are added to the milk and further sprayed on the cheese.
Let’s look at all these options in detail:
1. Vacuum Packing
A home vacuum packer can be a handy investment. Have a look at our review page to view some models. Vacuum packing your cheese is a worry free way of aging it. The softer the cheese is, the faster it will age. If you are aging a soft or semi-soft cheese, start with 2 weeks and then try it. With a hard cheese, start with a month, then give it a try.
You can also age vacuum packed cheese in the fridge. It will slowly develop more flavour. The breakdown of proteins does not require oxygen and the cheese will age well in a vacuum pack.

2. Waxing

Waxing has the same effect as vacuum packing. The wax will make the cheese surface air tight. Cheese wax comes in a variety of colours and can make the cheese look more attractive and more artisan looking than plastic. Waxing is meant for semi hard and hard cheeses. You can order cheese wax here.
Procedure:
Place the wax in a stainless steel bowl, then place the bowl into a pot with boiling water and let the wax melt. You can melt the wax directly on the stove top, just do so on low heat, so it doesn’t burn. Grab the cheese with your hands, or BBQ tongs. Dip the cheese half way into the wax, then slowly remove it. Hold it in mid air for 30 seconds, then turn the cheese around and dip the other side. Hold it in mid air for 30 seconds then place it on your aging rack or board. You can use a kitchen brush to touch it up. The breakdown of proteins does not require oxygen and the cheese will age well when waxed.
Waxing your cheese is a worry free way of aging it. The softer the cheese is, the faster it will age. If you are aging a semi-soft cheese, start with 2 weeks aging, then try it. With a hard cheese, start with a month, then give it a try. You can also age waxed cheese in the fridge. It will slowly develop more flavour.
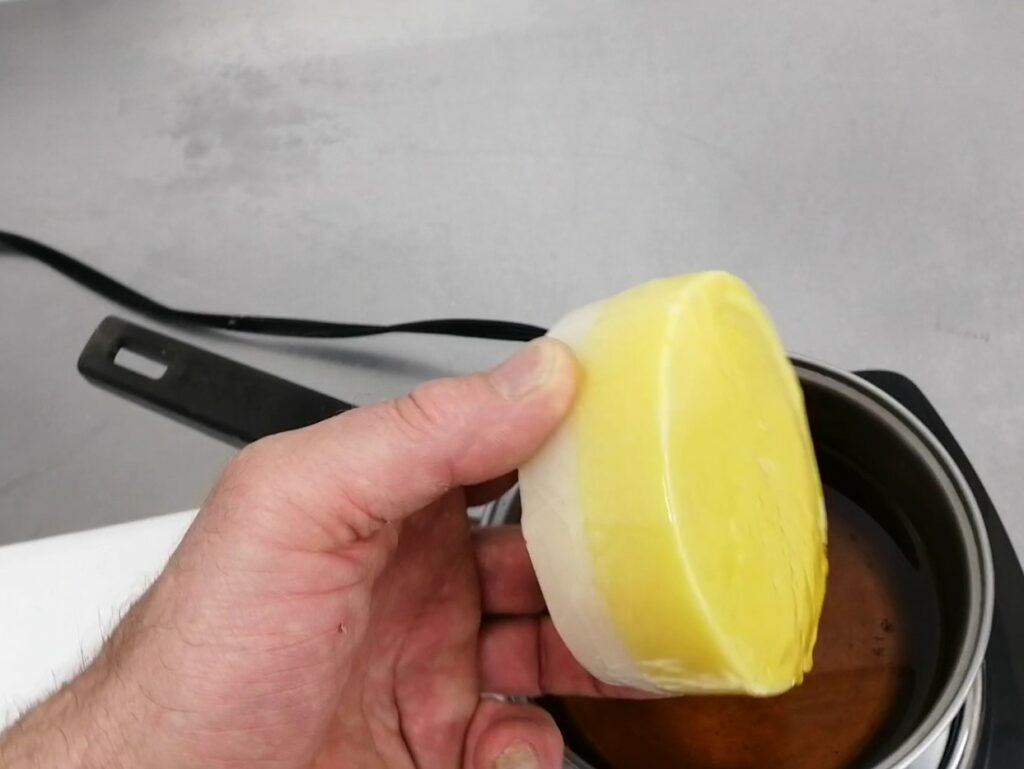
Melt the wax in a pot and dip half of the cheese into the wax.
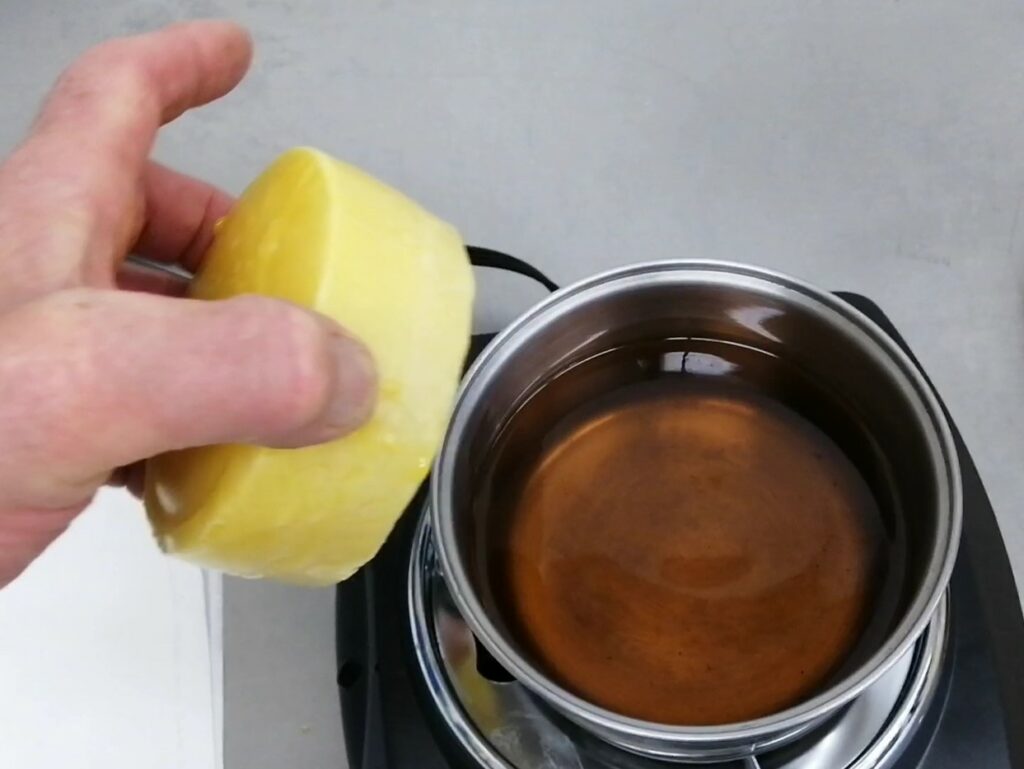
Dip the other half of the cheese into the hot wax. The wax will dry within seconds.

The wax protects the cheese from drying out and from getting mouldy.
3. Rind Ripening
3.A. Further aging cheese that already has a rind
If you purchased some of your favourite rind cheese and you want to further age it, you need to keep it in an environment that is humid enough so the cheese doesn’t dry out. It also helps to wash the cheese daily with a moist cloth and flip it over. Don’t make the cheese dripping wet, just wipe it with a humid cloth. What works great is a wooden box, which allows air to flow through. The air holes must be covered with a fly screen. The box should be kept humid. A clay brick in the bottom of the box works really well. Have a look at these cheese aging boxes I recommend. Find more helpful tips in below notes about How to best age cheese at home.

3.B. Creating a rind on your home made cheese
The main driver in this process is a bacterium called Brevibacterium Linens. This bacterium is also found on our skin and is the main reason for foot odour (Eww). I know this might sound gross, but B. Linens contribute largely to the flavour development in a rind aged cheese.
The bacterium is added to water and the fresh cheese is brushed with this water daily. This is also called “smearing” or “washing” the cheese. At first the cheese will develop a slimy surface which will start to dry up during the first month. Once the rind starts to develop, the cheese maker brushes the cheese every second day.
You can create a rind on any homemade cheese that is firm enough to keep its shape when kept at room temperature. It comes down to the water content in your cheese. Semi-hard and hard cheeses work best for rind ripening.
Your cheese is ready for making rind once it is removed from the cheese mould and has been salted. You would have salted the cheese either directly into the curd or via a brine. For more details on that refer to any of our cheese making recipes.
What you need to make rind development successful:
- Create an environment where the cheese doesn’t dry out and is protected from insects.
Here some examples:
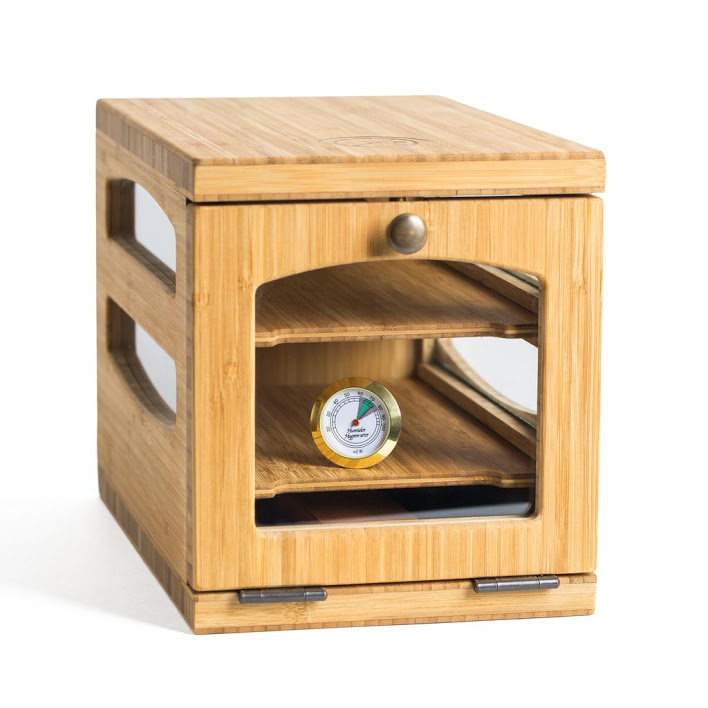
- There are some ready to use solutions on the market. We can really recommend these cheese aging boxes, including a clay brick to keep the moisture.
- An old fridge can make a great cheese aging room. It is important to create some airflow by cutting a hole in the top and the bottom. Make sure to cover the holes with a fly screen. Set the dial to the lowest setting, which might still be too cold and needs to be shut off. The problem with a fridge is that the cooling unit dries the air. You need to really keep an eye on the humidity.
- A plastic storage box is an easy and inexpensive way to create a cheese aging box. Place a perforated plastic mat or a bamboo mat into the bottom and put your cheese on it. Partially close the lid to keep the moisture in. You can add some damp paper towel, a sponge or a clay brick (as mentioned above) to keep it moist. Leave the lid a tiny bit open to start with. Don’t close it shut. Flip the cheese daily and keep the towel/sponge/brick moist. If the cheese begins to dry out, close the lid more. If the cheese gets slimy, then it needs more air.
- If you are only making one cheese at the time, the easiest way is to cover the cheese with a large kitchen strainer. Then cover it with a damp cloth. The cloth will let air thru, however if the cheese gets slimy, remove the cloth from the strainer to let more air flow through.

-min")
A plastic tray will make an inexpensive cheese aging box

A large kitchen strainer and a damp cloth will make a good enough cheese aging environment.
2. Prepare the rind wash water:
It really helps the rind development to add some freeze dried Brevi Bacterium Linens bacteria to the water, which you can order here.
However, you can get away with scraping some rind off a ripened cheese. You can also do without the bacteria, the rind will still develop, but it will take a bit longer.
Procedure:
- Add cold water to a medium bowl and add 1/8 tsp of brevi bacterium. You can order it here.
- Get yourself a little brush like a vegetable brush. You can order one here.
- Dip the brush into your rind-wash water and brush the cheese on one surface and on the sides. The washed surface always stays up. The next day, flip the cheese and wash the other surface and the sides. Do this daily and a slimy surface will start to form. You will see the rind develop over about a month. After a month the rind should start to dry out a bit.
- Once the rind has developed, you can either consume your cheese or further age it. Flip it every second day and give it a light brush to keep the surface moist.
- Variations: you can add pretty much anything edible to your wash water to give the cheese a unique flavour. Examples are:
- Annatto: gives the rind an orange look, but doesn’t affect the flavour. You can order Annatto here.
- Black peppercorn
- Sea Salt or Himalayan salt
- Beer
- White wine
- Red wine
- Basil leaves
- Rosemary
- Olive oil
- Balsamico
- Or anything you are curious to experiment with
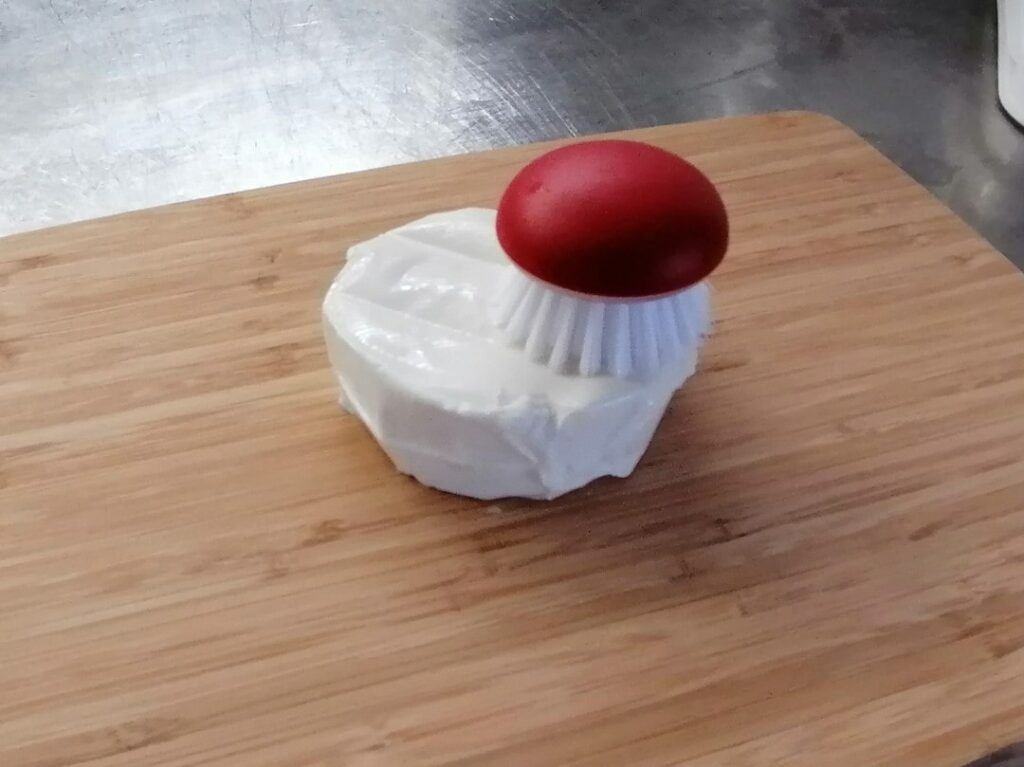
A vegetable brush works well to wash cheese for rind development
")
A bit of annatto will give a rind an orange colour

After a month thin layer of rind will develop on the surface
4. Surface Mould Ripening
4.A. Further aging of a cheese that already has an established mould:
If you like your brie runny, and you bought it with a firm texture, it is a good idea to further age it at home. Again, a cheese aging box that allows air to flow through and provides some moisture will make this easier. (see below).
Alternatively you can age a mould ripened cheese on a cutting board covered with a strainer. Further cover the strainer with a moist towel. Ideally the mould ripened cheese should rest on a mat, so air can circulate under it. You can order a cheese mat here, or you can use a bamboo placemat instead. At room temperature a mould ripened cheese can get runny within a week.

4.B. Making your own mould ripened cheese:
To see the detailed cheese making recipe go here.
The two main moulds that create white fuzz are called: Geotrichum Candidum and Penicillium Candidum (also known as Penicillium Camemberti). You can order them here. Best is to use both in combination. Geo creates the first layer of fuzz fast, then the Penicillium makes a fluffy finish. It’s best is to add ⅛ of a tsp of each mould culture to your milk along with your starter culture (see detailed Brie recipe here). Then dissolve ⅛ of a tsp of each culture in a cup of water and add to a spray bottle.
Once your cheese comes out of the brine, let it dry for half a day, then spray it with the mould water and place into the aging box. As mentioned earlier, you can alternatively age a mould ripened cheese on a cutting board covered with a strainer. Further cover the strainer with a moist towel. Ideally the mould ripened cheese should rest on a mat, so air can circulate under it. If you don’t want to buy any mould culture you can scrape some mould off an existing Brie or Camembert, dissolve it in water, and spray the cheese with it.
Blue Cheese: The blue mould is called Penicillium Roqueforti and can be ordered here. Add an ⅛ of a tsp to your milk along with the starter culture. You can also take some blue mould from an existing blue cheese piece and add it to your milk. For the detailed recipe click here.
How to best age cheese at home
If you are a serious home cheesemaker and want to make mould or rind ripened cheese on regular bases, it is a good idea to create an aging box or even an aging room.
The three most important criteria are temperature, humidity, and air circulation.
Temperature:
The basic rule here is, the lower the temperature, the slower the cheese will age, the slower the mould or the rind will develop. The higher the temperature, the faster mould or rind will develop, but there is also an increased risk that unwanted moulds can develop.
The ideal temperature to age cheese is between 11 C/ 52 F and 15 C/60 F degrees. Here some examples how to achieve that at home:
- An old fridge, with the dial set on low.
- A basement.
- A root cellar.
- A separate room with an air conditioner.
- The coolest spot in your house.
Having said this, you can age your cheese at room temperature, especially if you are making cheese for the first time. Keep it in the coolest spot of your house.
Humidity:
Controlling the humidity is more difficult and also more crucial than the temperature. If the environment is too dry, the mould or rind will not develop and the cheese will dry out and crack.
I recommend using a hygrometer in your cheese aging box or area, since it is almost impossible to estimate the humidity. I can recommend this hygrometer/thermometer here.
Ideally the humidity should be around 90%, which is very hard to achieve without a commercial humidifier. Don’t get discouraged, if you can keep it at 70% your cheese will develop nicely. The easiest way to keep the humidity in the cheese is to cover it. Keep your aging box small, so it is full of cheese, then cover it or close it with just a bit of an opening for air to circulate.
Ways to keep your cheese aging area humid:
- Cover the cheese with a strainer then cover the strainer with a damp rag.
- Keep a damp rag or a sponge in your aging box or aging fridge.
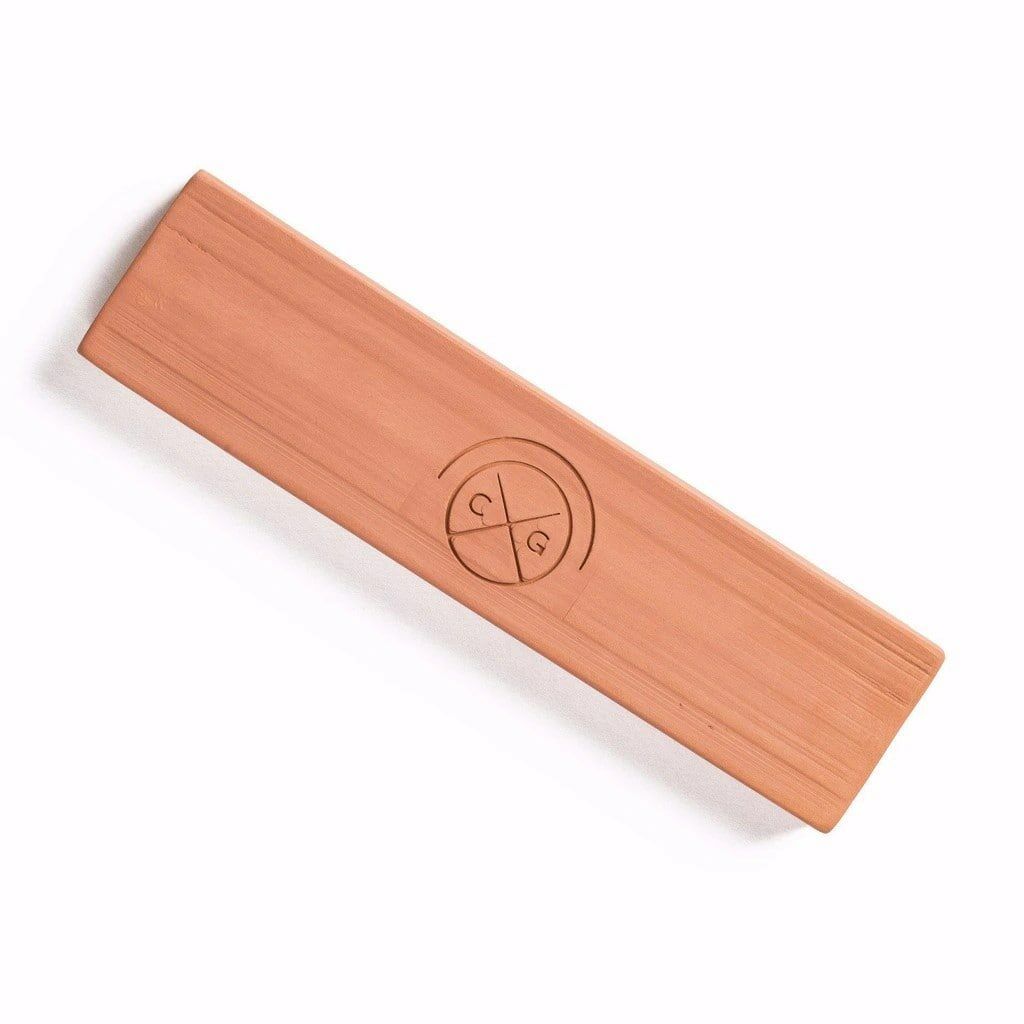
- Have a look at this clay brick, which works really well to hold humidity.
- If you have an aging room, or large box, use a household size humidifier, like this one: The humidifier must be a cold mist one. Make sure to use super clean water only. Keep the unit very clean at all times.
Air flow:
If the air in your aging area doesn’t renew itself the cheese will get mushy, slimy and can develop a really strong ammonia smell. Keep the lid of your aging box slightly open, make small air holes into your aging room or aging fridge. Depending of your outside air humidity, you will have to adjust the opening. Start with the smallest opening to keep as much humidity inside.
Examples of cheese aging boxes:
- There are some ready to use solutions on the market. We can really recommend these cheese aging boxes, including a clay brick to keep the moisture.
- An old fridge can make a great cheese aging room. It is important to create some airflow by cutting a hole in the top and the bottom. Make sure to cover the holes with a fly screen. Set the dial to the lowest setting, which might still be too cold and needs to be shut off. The problem with a fridge is that the cooling unit dries the air. You need to really keep an eye on the humidity.
- A plastic storage box is an easy and inexpensive way to create a cheese aging box. Place a perforated plastic mat or a bamboo mat into the bottom and put your cheese on it. Partially close the lid to keep the moisture in. You can add some damp paper towel, a sponge or a clay brick (as mentioned above) to keep it moist. Leave the lid a tiny bit open to start with. Don’t close it. Flip the cheese daily and keep the towel/sponge/brick moist. If the cheese begins to dry out, close the lid more. If the cheese gets slimy, then it needs more air. Pic 15/16
- If you are only making one cheese at the time, the easiest way is to cover the cheese with a large kitchen strainer. Then cover it with a damp cloth. The cloth will let air thru, however, if the cheese gets slimy, remove the cloth from the strainer to let more air flow through.
A plastic tray will make an inexpensive cheese aging box

A large kitchen strainer and a damp cloth will make a good enough cheese aging environment.
Regardless of the aging box you chose, always place a mould ripened cheese on a perforated mat. Always place a rind ripened cheese on a wooden cutting board or a perforated mat. Flip the cheese at least every second day.
Playing around with cheese is fun. The options are endless. You could even buy a piece of plastic wrapped orange cheddar, spray it with mould, and age it. It will turn white! Or buy a piece of plastic wrapped Havarti and start making a rind on it. It will work and create a completely new cheese. Making a flavoured rind is fun to experiment with as well. There is no limit to what you can try.
Enjoy and have fun!