How To Make brie Cheese

Brie cheese originates in the region of Brie near Paris, France. It is a popular cheese and it is being reproduced all over the world. There are only two original Brie cheese varieties left, Brie de Melun and Brie de Meaux, both produced from raw milk in the historic region of Brie. Brie comes in different shapes, sizes, and flavours. There are different techniques to make Brie, some are referred to as the “traditional French” method, others as the “American method”. Regardless of the method used, Brie should soften from the center, unlike Camembert, which should stay firm in the center and soften around the edges. This is my favourite recipe to make Brie.
Check out our post on How to Make Cheese at Home to learn the art of making cheese. It’s a fun project for everyone.
For easy homemade cheese recipes check out our Cheese Making Recipes page.
If you are interested in the world of cheese making, visit our cheese Resource page and our How Cheese is Made post.
We review and suggest Cheese Making Kits here if you would like to get started with making cheese.
Enjoy!!!
How To Make Brie Cheese
Sanitation:
Brie can be tricky to make because unwanted moulds can interfere with the white mould. You don’t want any black or green spores to grow; therefore, keeping everything perfectly clean is really important. Wash everything with detergent and hot water and rinse well. If you don’t mind bleach, it’s an inexpensive way to sanitize the tools. Rinsing the tools with boiling water is a natural and effective way as well.
In order to be successful you need to order white mould culture from a reliable source (see ingredients below). Handle the culture bags carefully:
- Store them in the freezer.
- Before opening, sanitize the bag with rubbing alcohol or peroxide.
- As a home cheese maker you won’t need the entire bag. Pour the culture onto a spoon to measure off the amount, rather than dipping a spoon into it.
- Once you extracted the needed amount, fold the bag and tape it shut. Then put it back into the freezer.
Tools needed:
- A pot that comfortably holds 2 L/ 2 qt of milk
- Thermometer, you can order one here
- Sharp knife
- Ladle
- Large spoon
- Cheese mould of 8 cm/ 3 inches diameter will make a nice sized cheese. Order a mould here
- A perforated plastic or bamboo mat. You can order one here
- Pasta strainer
- Small kitchen strainer
- Measuring cup
- Glass or stainless bowl to make a brine
- Spray bottle
- Large kitchen strainer that can be placed over the cheese (this is used later to develop the white mould, there are alternatives which are explained below)
Ingredients:
- 2 L/2 quarts of milk.
- ¼ of a rennet tablet or liquid rennet according to the manufacturer’s recommendation. You can order rennet here.
- ⅛ tsp of mesophilic and thermophilic culture blend, you can order that here.
- ⅛ tsp of calcium chloride (not necessary for raw milk). You can order it here.
- ⅛ tsp of white mould culture, Geotrichum Candidum, you can order that here.
- 1/8 of a tsp second white mould culture, Penicillium Candidum, you can order it here.
- 2 cups of 38 C/ 100 F drinking water.
- 6 Tbsp of salt.
Procedure:
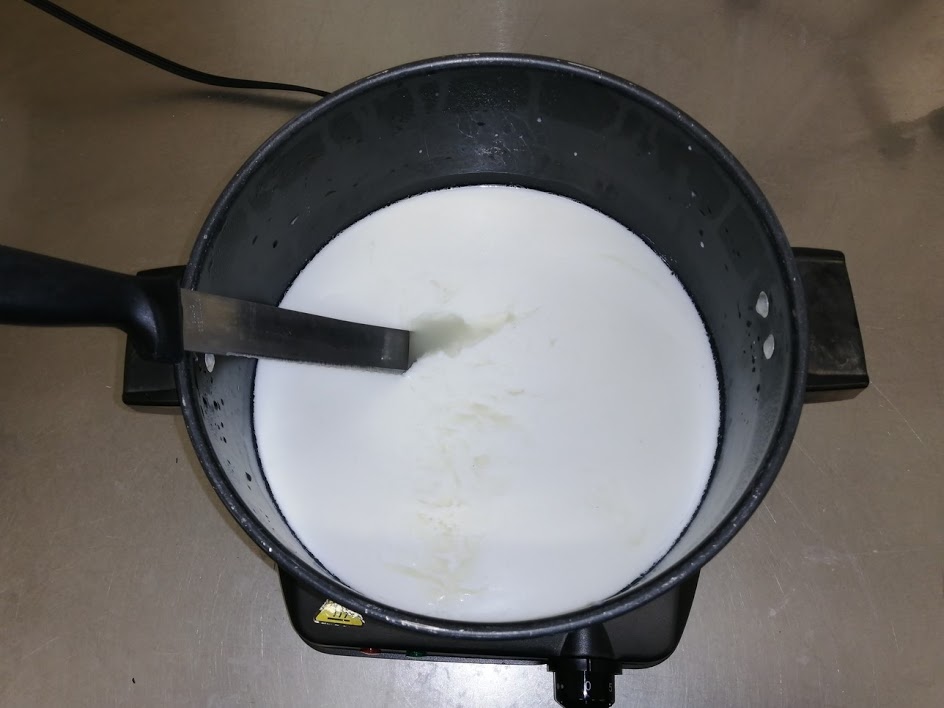
- Pour the milk into the pot and on low heat warm it to 33 C/ 91 F.
- Add the cheese culture and the white mould culture. Cover the pot and let it sit for one hour.
- After an hour, warm the milk to 38 C/ 100 F.
- Mix the rennet with ¼ cup of cold, non chlorinated water.
- Stir in the rennet for 30 seconds, then make sure the milk is still.
- After 30 minutes check if the milk has coagulated. A good way to check is to let it break over the finger, it should make a clean cut.
- With a sharp knife cut the curd into half-inch squares.
- Let the curd set for 5 minutes.
After 30 minutes check if the milk has coagulated
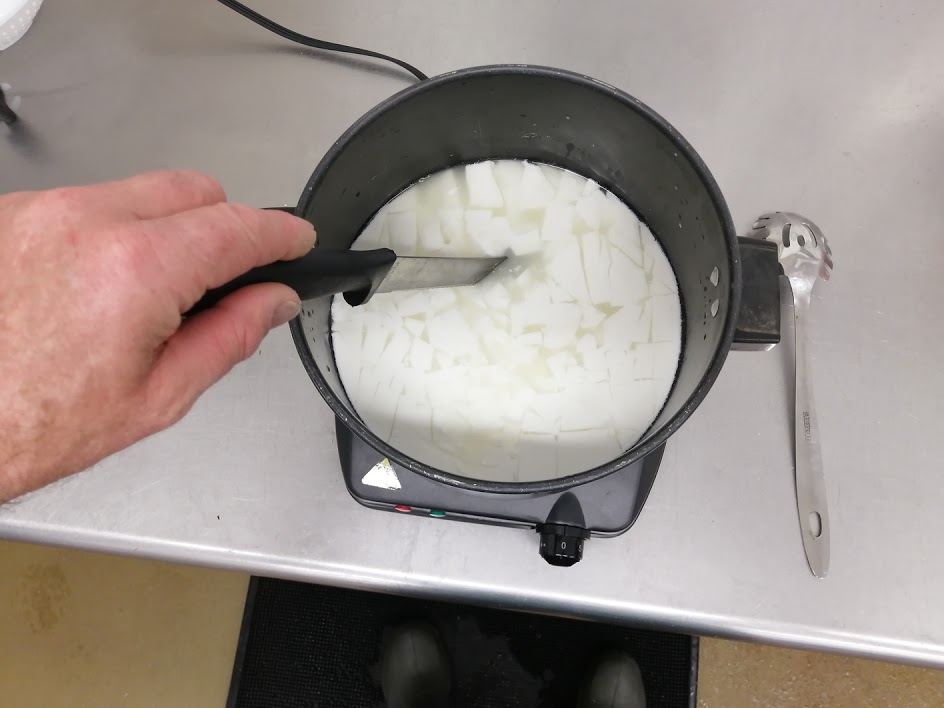
Cutting the curd into half-inch squares
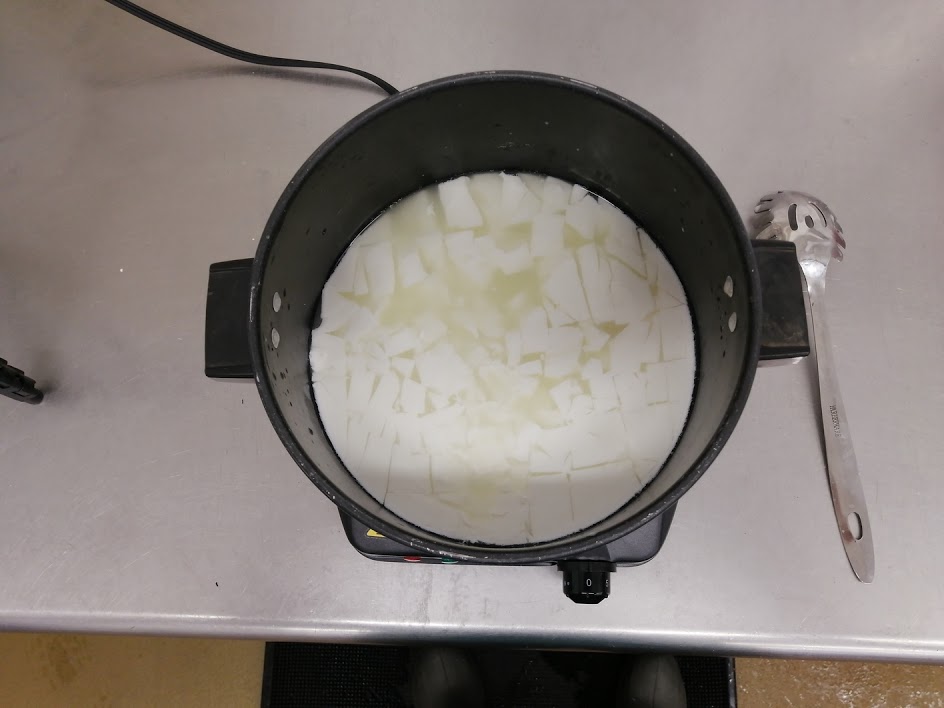
Let the curd set
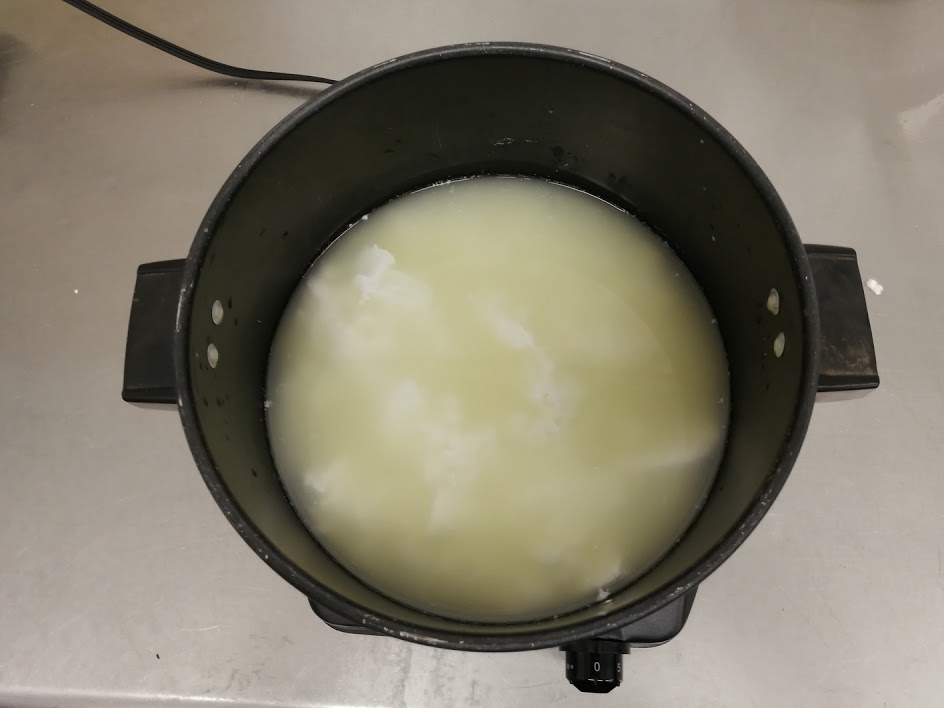
- With a large spoon carefully stir up the curd then let it sit for 5 minutes. Repeat this for 30 minutes.
- After the last 5 minutes, don’t stir up the curd, but scoop off 2 cups of whey from the top. Use your ladle for this. You can also place the lid on the pot and carefully pour out 2 cups of whey. Keep the whey aside to later make the brine (don’t refrigerate it).
- Now add 2 cups of 38 C/ 100 F warm water to the curd.
- Briefly stir the curd so the water gets mixed in well.
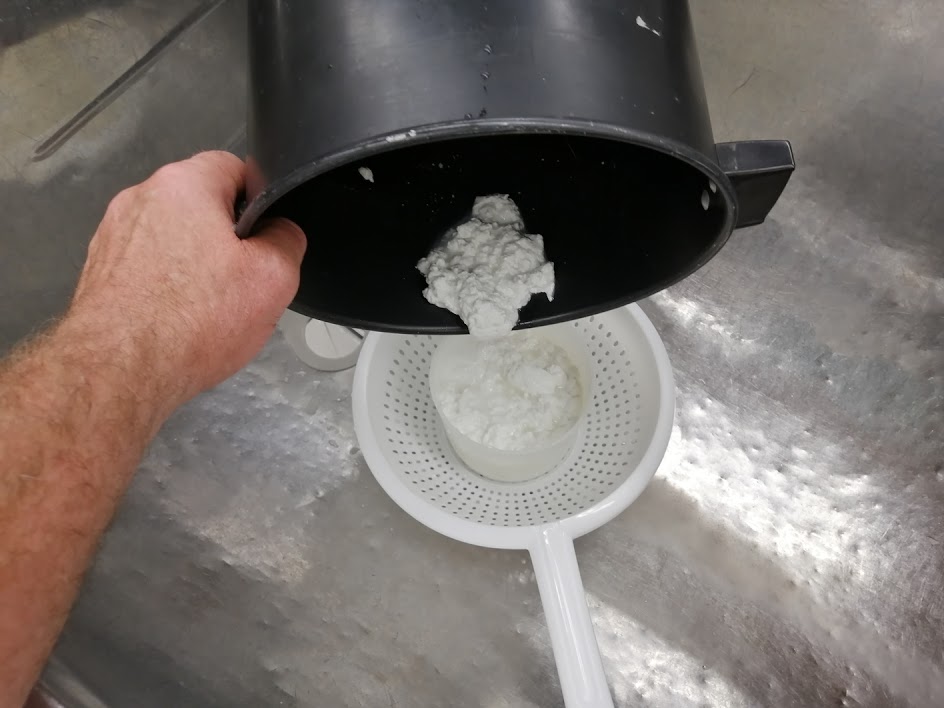
- Place your cheese mould into a pasta strainer in the kitchen sink.
- With the small kitchen strainer scoop out the curd and place it into the mould. You can also carefully and slowly pour the whey/ curd from the pot directly into the mould.
- This will fill the mould to the top.
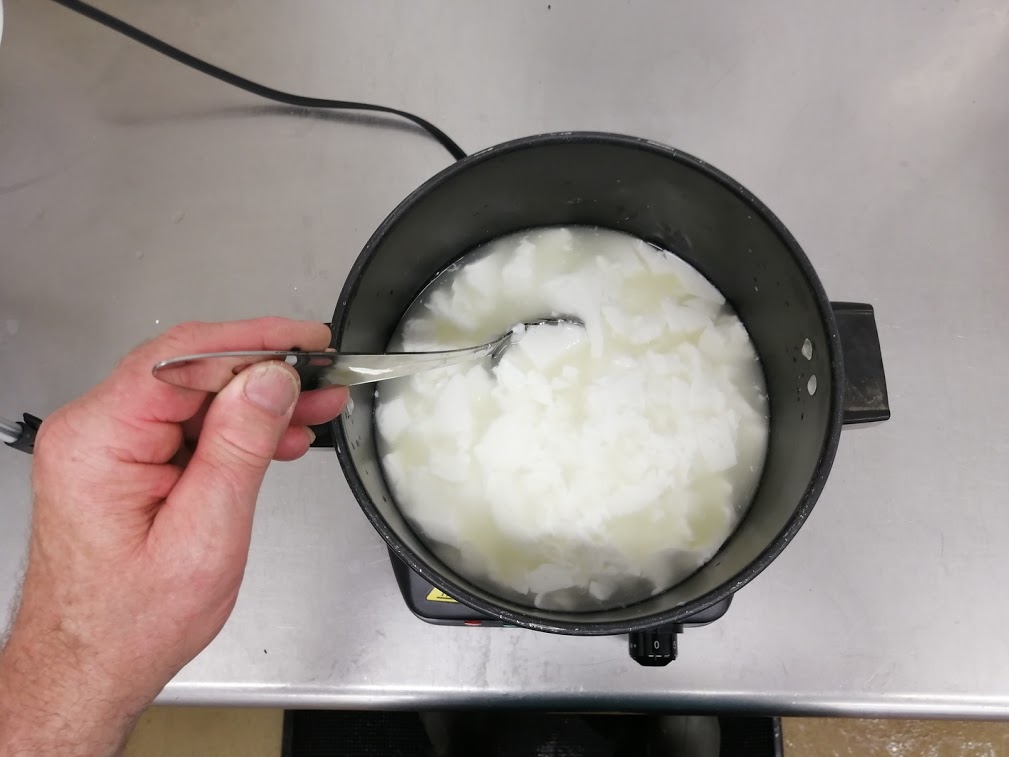
Carefully stirring the curd
Scooping off 2 cups of whey from the top
Pouring the whey/ curd from the pot directly into the mould
- Let the curd drain for 10 minutes.
- Cover it with a plastic bag or bowl to keep the warmth in.
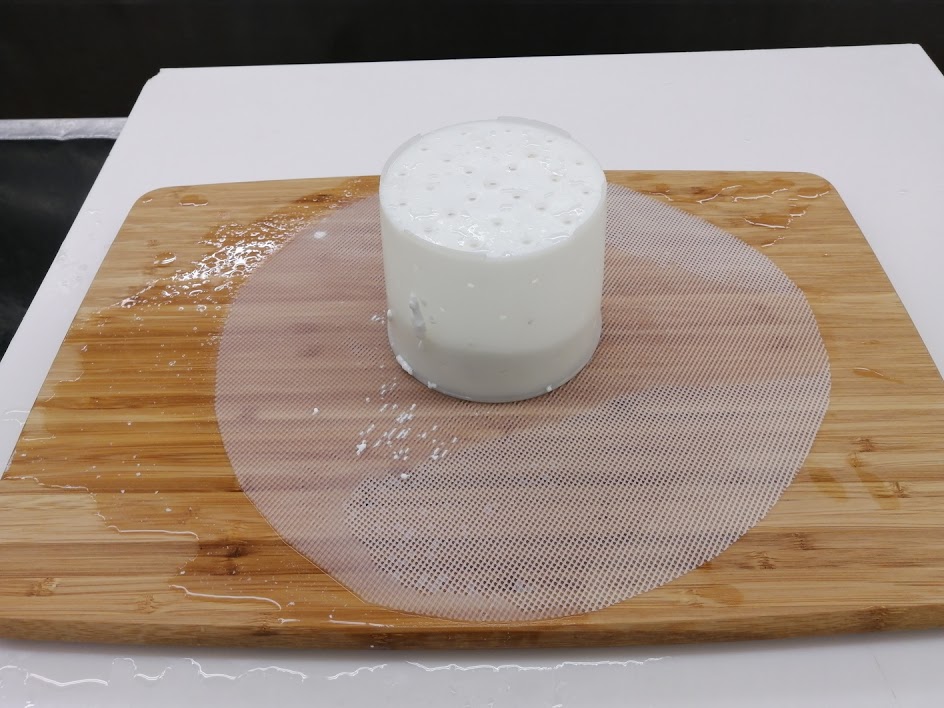
- Flip the mould onto the plastic or bamboo mat. Best to do this in the sink to avoid spillage.
- Flip the mould every two hours for a total of 4 times (8 hours).
- After the 4th time let it sit for 3 hours. Cover it every time.
- After the 12 hours remove the cheese puck from the mould.
- If you own a pH meter, the pH should be between 5.1 and 5.3.

Flipping the mould onto a plastic mat
Flipping mould every 2 hours

Let sit for 3 hours after last flip
- Make the brine: combine the 2 cups of whey you kept aside and 2 cups of cold water with 6 tbsp of salt.
- Stir well.
- Place the cheese into the brine for a total of 30 minutes. Since it will float, you need to flip it at the 15 minute mark.
- If you intend to make more cheese, fill the brine into a jar with a lid and refrigerate after each use. You can keep using it.
- Clean the plastic or bamboo mat with soap and pour boiling water over it, let dry.
- Prepare the spray bottle: add ½ a cup of cold water and an ⅛ tsp of white mould culture.
- Place the mat on a cutting board and add the cheese.
- Briefly spray the cheese with the mould spray bottle. Don’t soak it, just mist it with a brief spray.
- Spray both sides of the cheese.
- Cover the cheese with a large kitchen strainer and place a wet kitchen towel over the strainer. The towel shouldn’t drip water, it should just be damp. Leave a small window open for the air to circulate. Keep the towel moist.
- Place the cheese in a cool place. Ideal would be about 15 C/ 59 F. Room temperature works as well, although the cheese might get runny much faster and might be more susceptible to unwanted mould.
- Every day, flip the cheese. If you intend to make more white mould cheese, keep the spray bottle in the fridge for your next batch.
- Watch the mould grow. It should be ready in 10 to 14 days.
- Once the cheese is fully covered and fluffy, wrap it in wax paper and refrigerate.
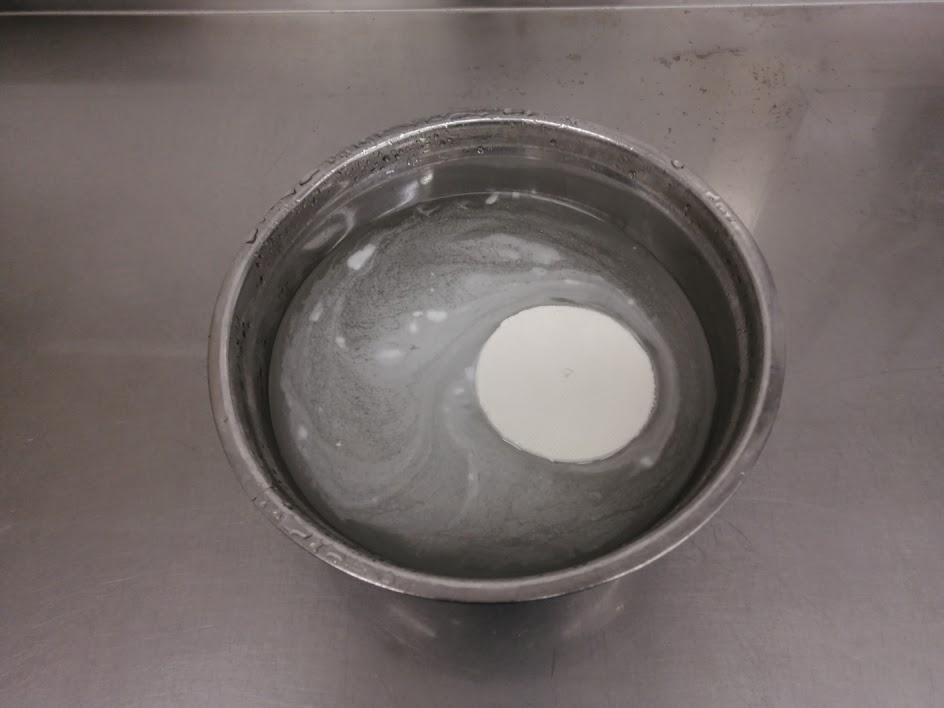
Cheese floating in the brine, make sure to flip it halfway through
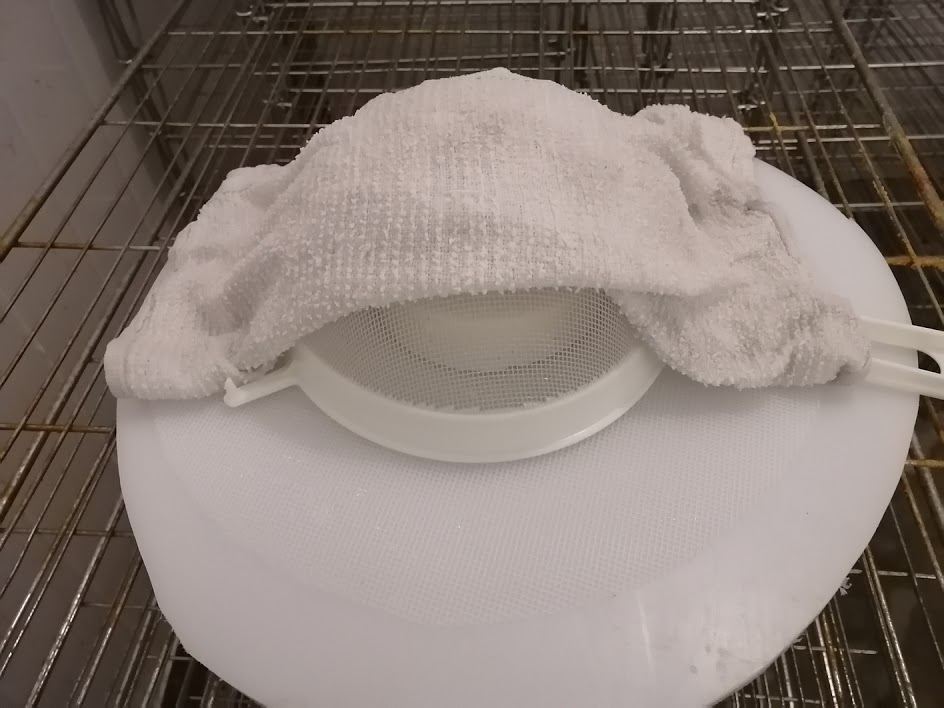
Cheese covered with a strainer and a wet towel with a window for air circulation
How To Best Age Brie
If you are a serious home cheese maker and want to make mould ripened cheese on regular bases, it is a good idea to create an aging box or even an aging room.
There are some ready to use solutions on the market. We recommend these Cheese Aging Boxes.
- A specially designed clay brick can help keep the moisture in your cheese box. We recommend this Clay Brick.
- An old fridge can make a great cheese aging room. It is important to create some airflow by cutting a hole in the top and the bottom. Make sure to cover the holes with a fly screen.
- A plastic storage box is an easy and inexpensive way to create a cheese aging box. Place a perforated plastic mat or a bamboo mat into the bottom and put your cheese on it. Partially close the lid to keep the moisture in. You can add some damp paper towel, a sponge or a clay brick (as mentioned above) to keep it moist. Leave the lid a tiny bit open to start with. Don’t close it shut. The cheese needs air. Check flip the cheese daily and keep the towel/sponge/brick moist. If the cheese begins to dry out, close the lid more. If the cheese gets slimy, then it needs more air.
For more info on cheese aging have a look at our blog here.
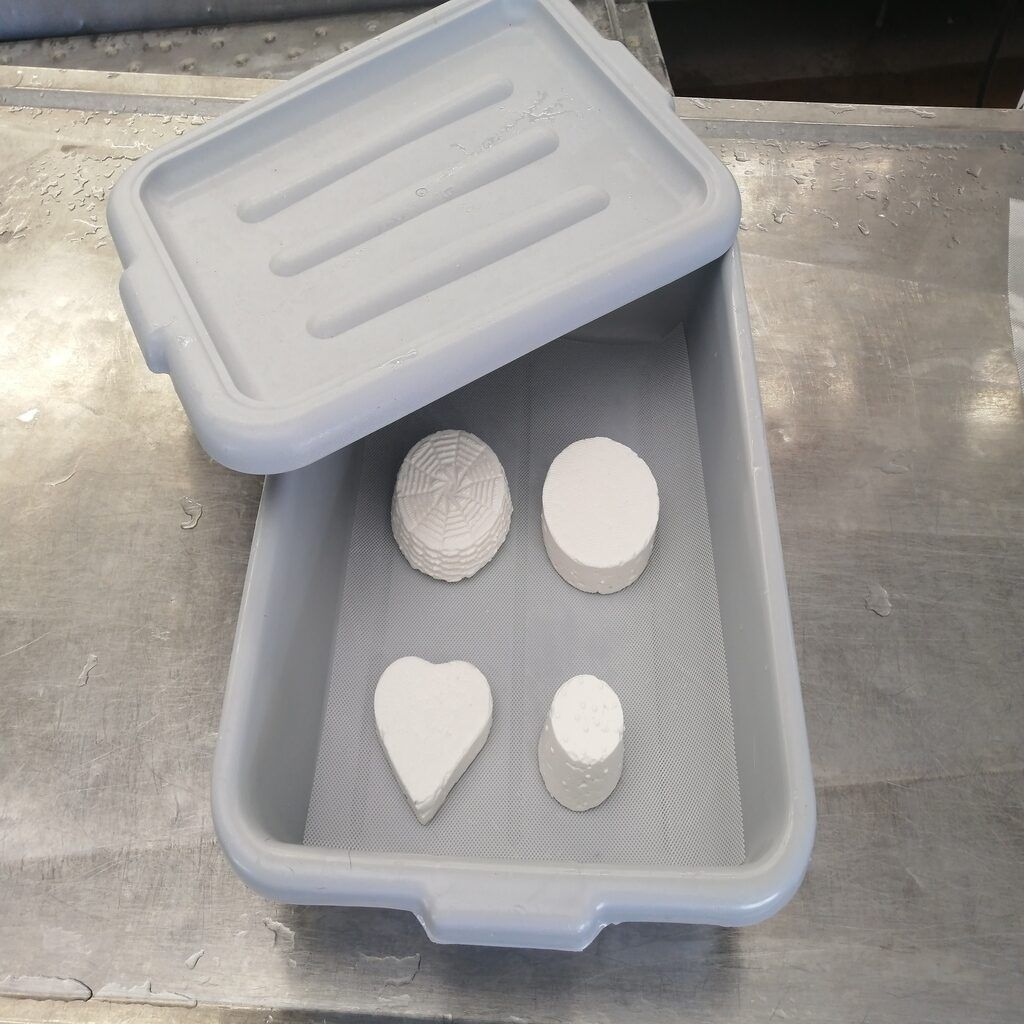
A plastic box with a perforated plastic or bamboo mat makes an inexpensive cheese storage
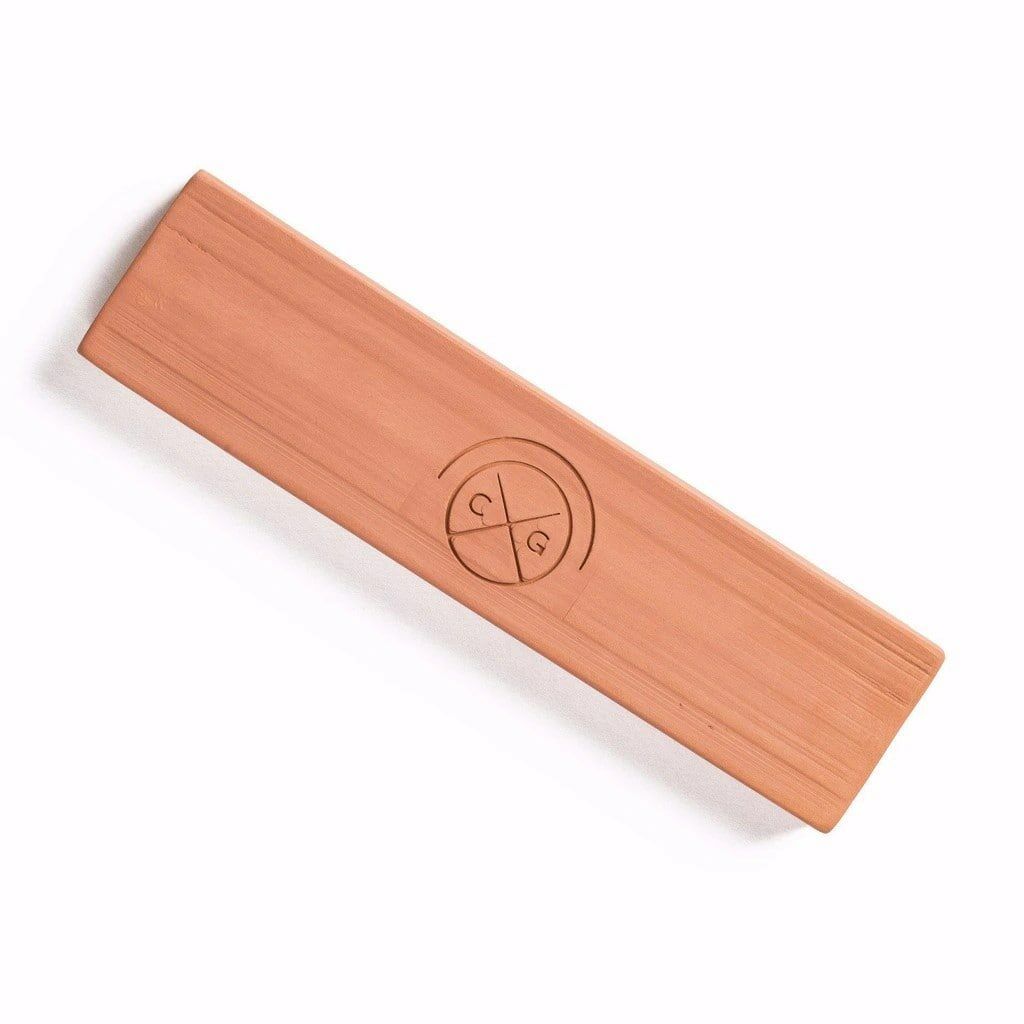
A clay brick keeps the moisture inside the cheese box

This cheese aging box looks attractive and helps the cheese ripen under the right conditions
Troubleshoot:
The milk doesn’t coagulate or coagulates only weakly: Did you use the proper amount of rennet? If you use liquid rennet, is the expiry date good? Did you mix the rennet with clean and non chlorinated water? Is your thermometer accurate?
The curd in the mould doesn’t drain properly and the cheese stays very soft: This could be when your culture is not active. Is the expiry date of the culture good? Did you keep it in the freezer? It could have to do with the milk. Sometimes homogenized milk can retain water and the cheese will stay very soft.
The white mould doesn’t grow: Is the expiry date of the white mould culture still good? Did you store it in the freezer? Are you keeping the cheese in a humid environment? Is your towel kept wet on top of the strainer that covers the cheese? The lack of humidity is most likely the main reason for poor mould development.
Black mould dots grow inside the white mould: Mould spores can be everywhere and airborne. With a knife remove the back spots, then move the cheese to a different area.
Leave us a comment below about how your recipe turned out. Feel free to suggest ideas or what you would like to see in our recipes.
Enjoy!!!