
How to make Cheese at Home


I would recommend reading my blog about How Cheese is Made first, it will help you understand the process of making cheese. I have reviewed some cheese making kits and cheese making supplies in my Review Section. Please leave me a comment below about how your home cheese making is going, and if there’s anything I can do to help.
Each Recipe has a troubleshooting guide, in case something didn’t go right. You are always welcome to ask a question in the comment box, this way other readers can read and learn from your questions.
Anything homemade is fun. Playing around with making your own cheese is a great experience. Cheese making kits also make great gifts for children or adventurous food lovers.
When choosing milk, farm fresh raw milk would be the best, but most people don’t have access to this anymore. Your next best choice is bottled milk from a local dairy. Often milk from family operations is less processed, which means it is pasteurized at a lower temperature and maybe not homogenized. You can try checking a local health food store, or maybe a local dairy with direct farm gate sales. You can use any pasteurized milk you find in your grocery stores. The following 3 recipes will work just fine with pasteurized and homogenized milk.
Do not use UP (ultra pasteurization) or UHT (Ultra high temperature) milk. These milks are processed at very high temperatures to extend shelf life and won’t work for the home cheese maker.
I suggest to start with 1L/1qt of milk for all recipes, until you get the feel for it. Once your cheese turns out to your satisfaction, you can increase the milk to 4L/1Gal. That will give you about 450g/1lb of cheese. I recommend to use whole milk or at least partly skimmed milk. Cheese from skimmed milk does not have a pleasant texture.
Before you start, make sure your work area and all utensils are sanitized.
What you will need
- Cow, goat or sheep milk, whole or partly skimmed
- One stainless stove top pot to hold the milk comfortably
- Thermometer. Any department store type thermometer works. Most cheese kits come with one. The temperature range we need is 20C/68F to 50C/122F.
- White vinegar, apple cider vinegar, pure lemon juice or citric acid depending on the recipe
- Stainless whisk
- Sharp knife
- Kitchen strainer
- Pasta strainer
- Cheese culture depending on the recipe.
- Rennet or Microbial Enzyme.
- Cheese cloth.
- Cheese mould
- Vacuum Sealer (optional).

In the review section I give you an easy walk through where to buy the different ingredients. I am also reviewing different cheese making kits.
Thermometer
An accurate thermometer is important. I recommend a digital kitchen thermometer. A meat thermometer works well as long as it has a range starting at 20C70F. Most cheese kits I’ve looked at come with a tiny analog thermometer, which isn’t worth much. I can recommend this thermometer, I use it in the dairy plant all the time. We calibrate our thermometers on regular a bases and this one has proven to keep its accuracy.
Cheese Culture
We need to add some beneficial bacteria to our milk so the cheese can develop some flavor and acidity. Here are three easy ways to access some dairy bacteria:
Yogurt with active bacteria: Look for a plain yogurt. It needs to say on the packaging that it contains live culture or active bacteria. Some yogurts are re-pasteurized to extend the shelf life and no longer contain active cultures. Again, it is best if you can find a local brand. Most industrially produced yogurts do have a live bacteria version on the market since probiotics are in demand. Yogurt works best in cheeses that are warmed up during the process.
Buttermilk: Buttermilk is acidified milk. Acidification happens with live bacteria cultures. Again, make sure the brand advertises the “live bacteria” feature. Buttermilk is a great starter culture and works well in lower temperature cheeses. I am explaining the use of cultures in each recipe in detail.
Freeze dried starter culture: There are many good starter cultures available from different suppliers. If you are an amazon shopper, I recommend this Culture.
Rennet or Microbial Enzyme
All cheese kits supply this. Most kits have rennet tablets, some have liquid rennet. Tablets last a long time and are easy to measure off. You can buy rennet separately here. Sometimes health food stores carry it as well. Rennet needs to be dissolved in cold water before added to the milk. Rennet is very sensitive to chlorine. If you are on chlorinated water, I recommend either buying bottled water, or get a carbon filter that removes chlorine.
I recommend this Rennet.
Cheese Cloth
All cheese kits supply this, but you can also find it in most fabric stores. I have seen it in grocery stores as well, it is used for making jelly. Unbleached, uncoloured cotton works as well.
I recommend this Cheesecloth
Cheese Mould
A Cheese mould gives the cheese its form and drains the whey out. All cheese can be drained in a cheese cloth, it just won’t have a nice puck like shape. I suggest some cheese molds in my review section.
Storing Your Cheese
If you intend to eat your cheese within 10 days, you can easily keep it in a Tupperware or a zip-lock bag. The fresh cheeses I explain below, like Ricotta or Chevre can be frozen as well. Feta, in a salty brine, keeps for many months in the fridge. Home vacuum packing units work very well to keep cheese fresh for many weeks (see vacuum sealers in the review section). Aging your cheese with a rind or a mould I will explain in a separate chapter, none of the below recipes requires this.
I recommend this Vacuum Sealing Unit
1. Cheese Shark Homemade Cheese Recipe
Ricotta or Paneer
Ingredients:
1L/1qrt of raw or pasteurized milk
White or apple cider vinegar
Procedure
This is the easiest of all cheeses and works best with cow milk. It can be tricky with goat milk. Goat milk makes a very fine curd, which can be hard to extract for a beginner. Any store bought milk will work with this recipe.
Ricotta is a fresh cheese and can be consumed as soon as it is drained and cooled off. Italian Ricotta is very soft and can be used as a spread or used to stuff peppers. It can be spiced and seasoned with pretty much anything from salty, savoury, hot, or sweet.
East Indian Paneer is made the same way but made firmer and drier. It is often deep fried, since it doesn’t melt very well. It can also be fried in a saucepan or spiced and consumed as is.
Process
- First prepare your kitchen strainer. Make sure it is clean, rinse it with warm water. Then prepare the vinegar.
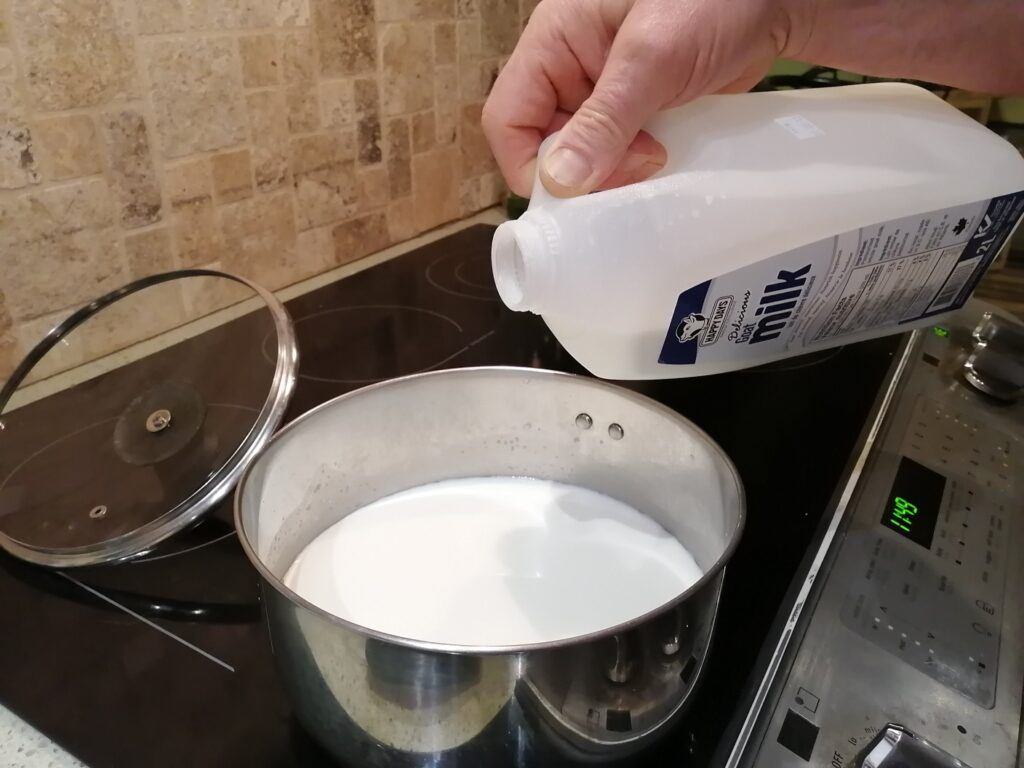
- Pour your milk into the pan and start heating on medium heat while stirring. You can’t stop stirring, the milk will stick to the pan and protein might separate as a thin layer on top of the milk.
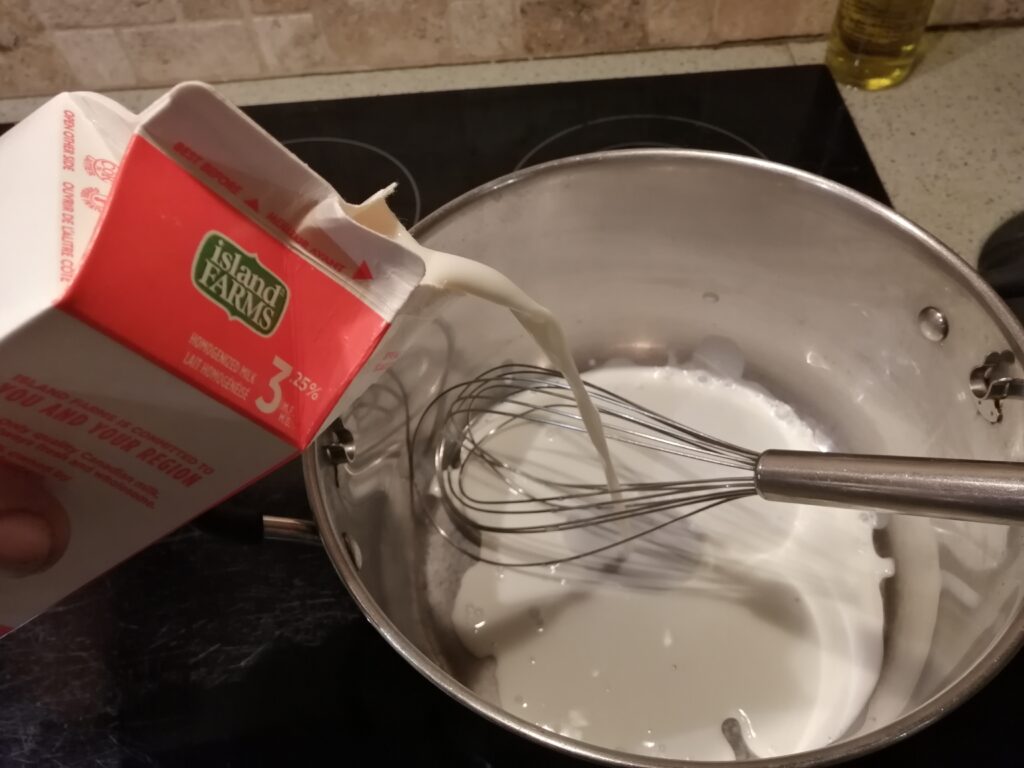
Homo milk works fine to make Ricotta
- Once the milk starts to steam, use your thermometer and heat the milk until it shows 90C/194F. Remove the pan from the heat and under constant but gentle stirring add vinegar. Add it slowly while slowly stirring.
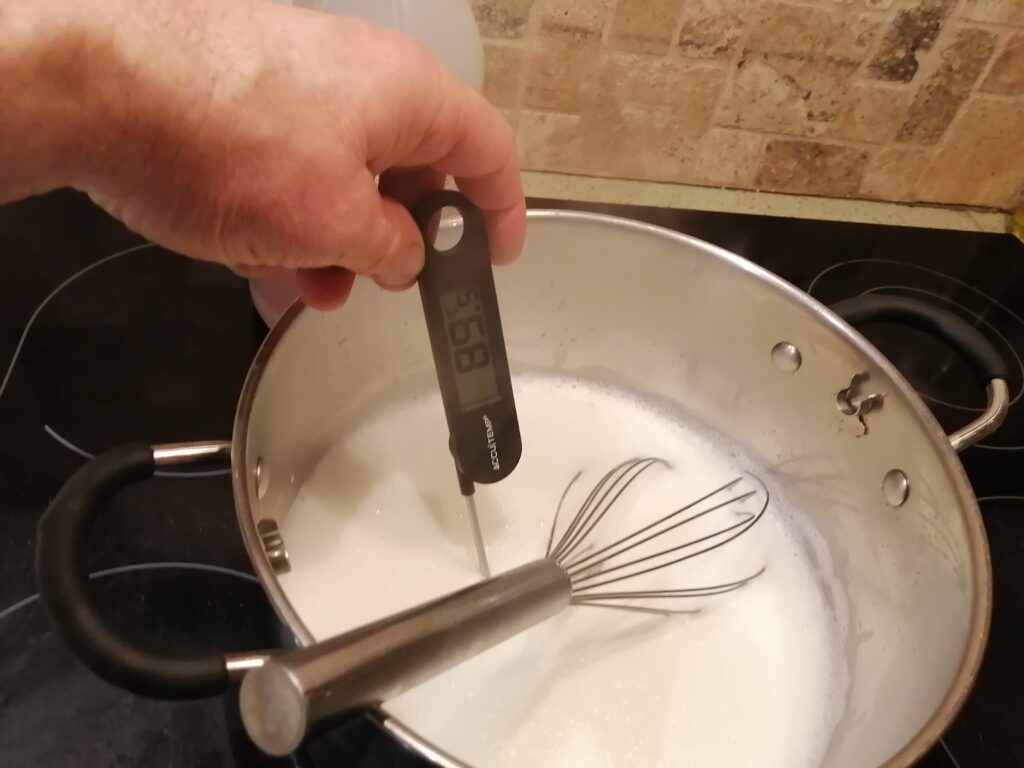
Heating the milk

Adding apple cider vinegar
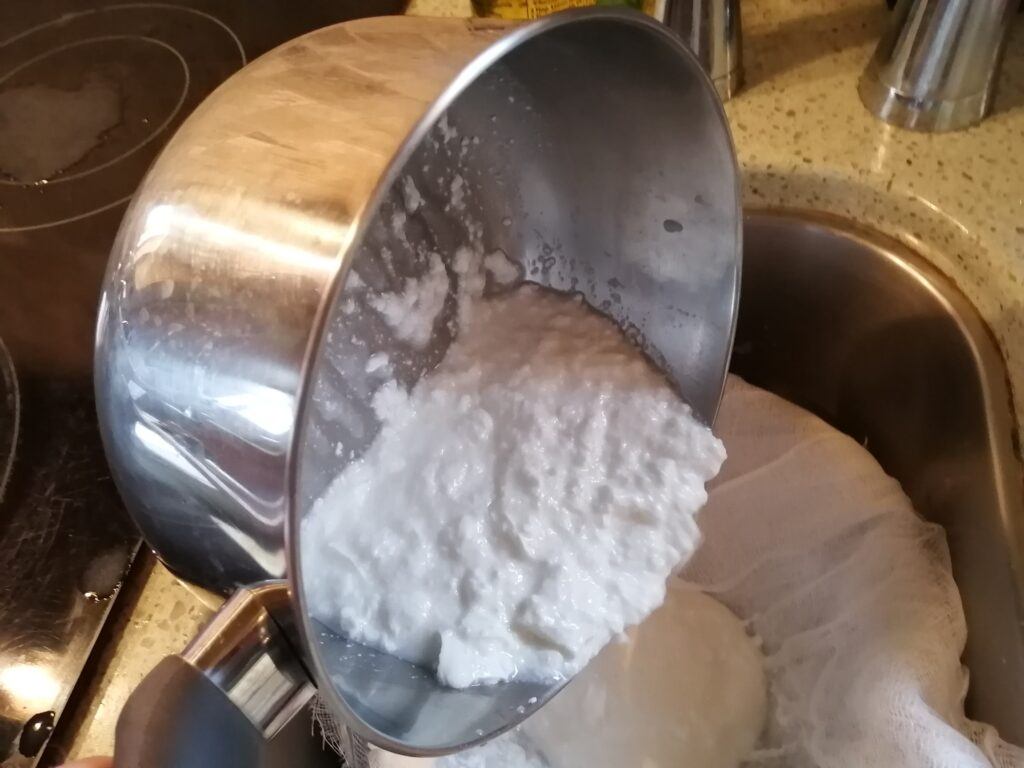
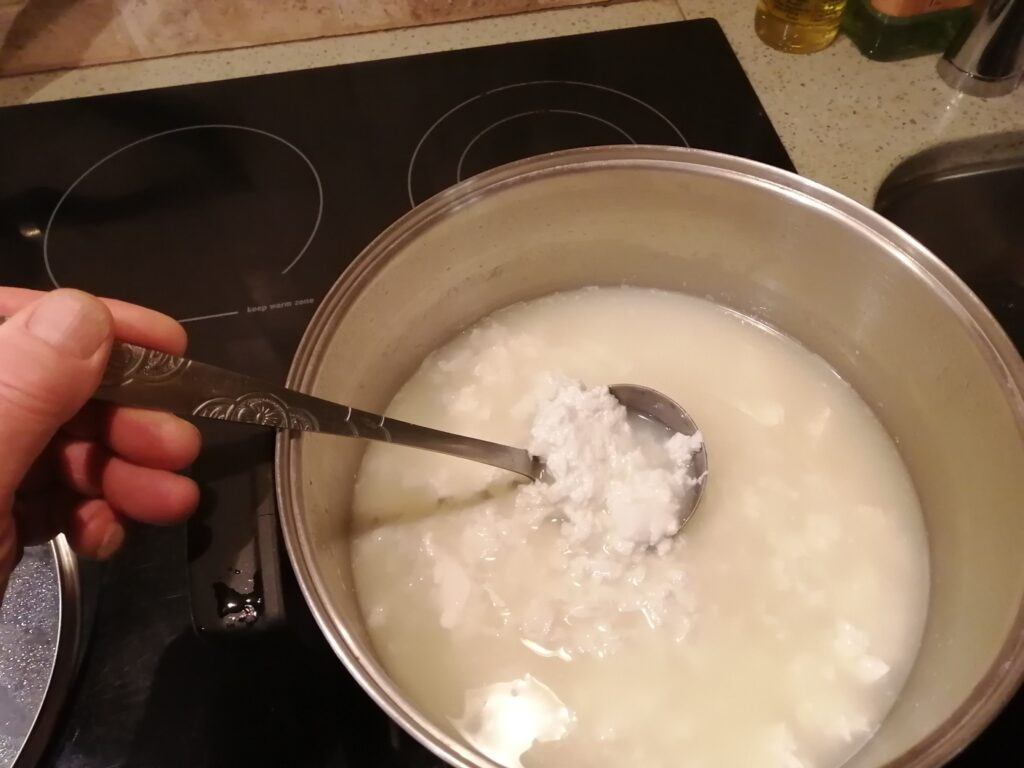
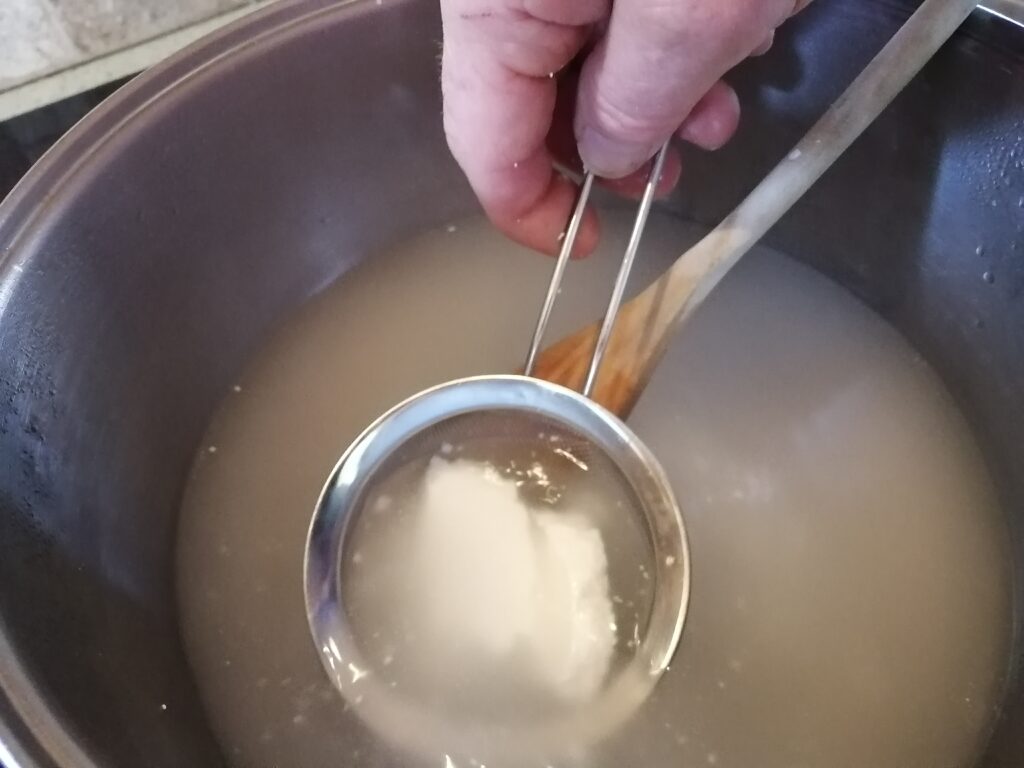
- All at a sudden, when the acidity has dropped enough, the milk will coagulate and start to make flakes, then lumps. You will see how the milk solids separate from the whey. It will become curdled milk.
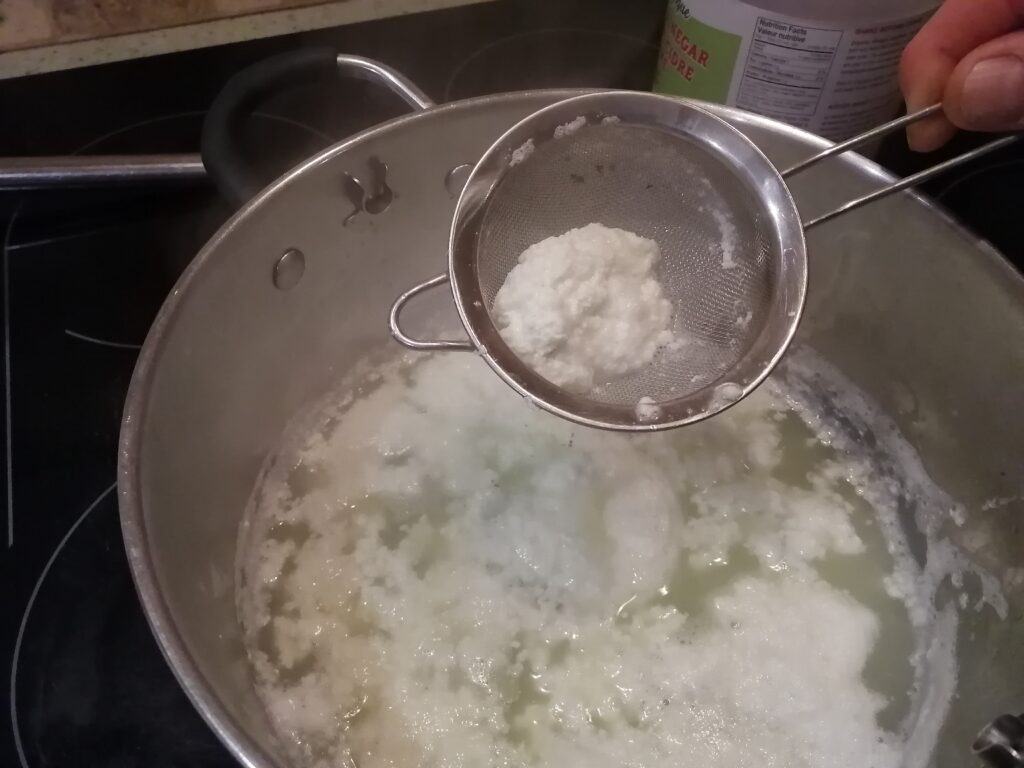
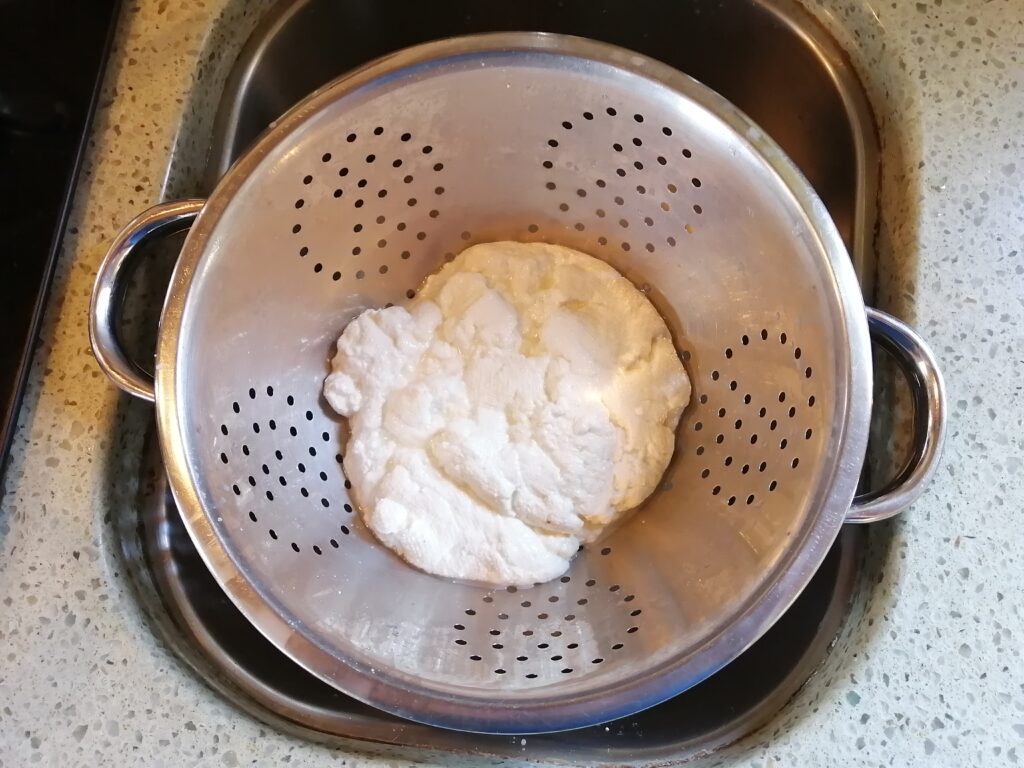
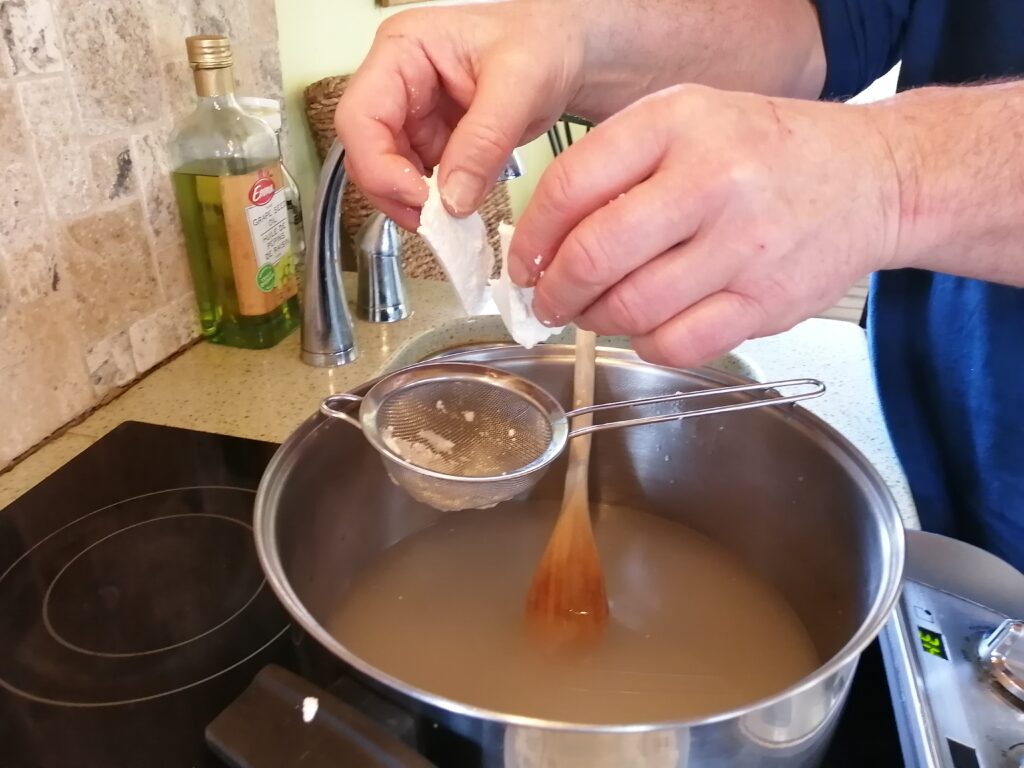
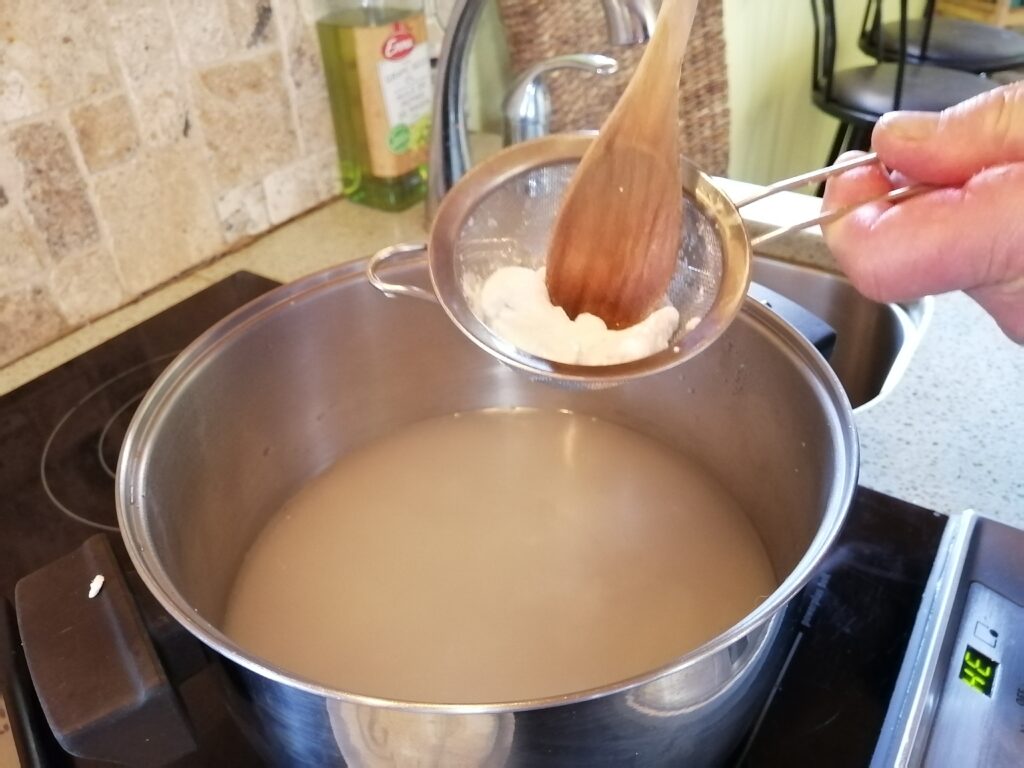
Scooping out the curdled Ricotta
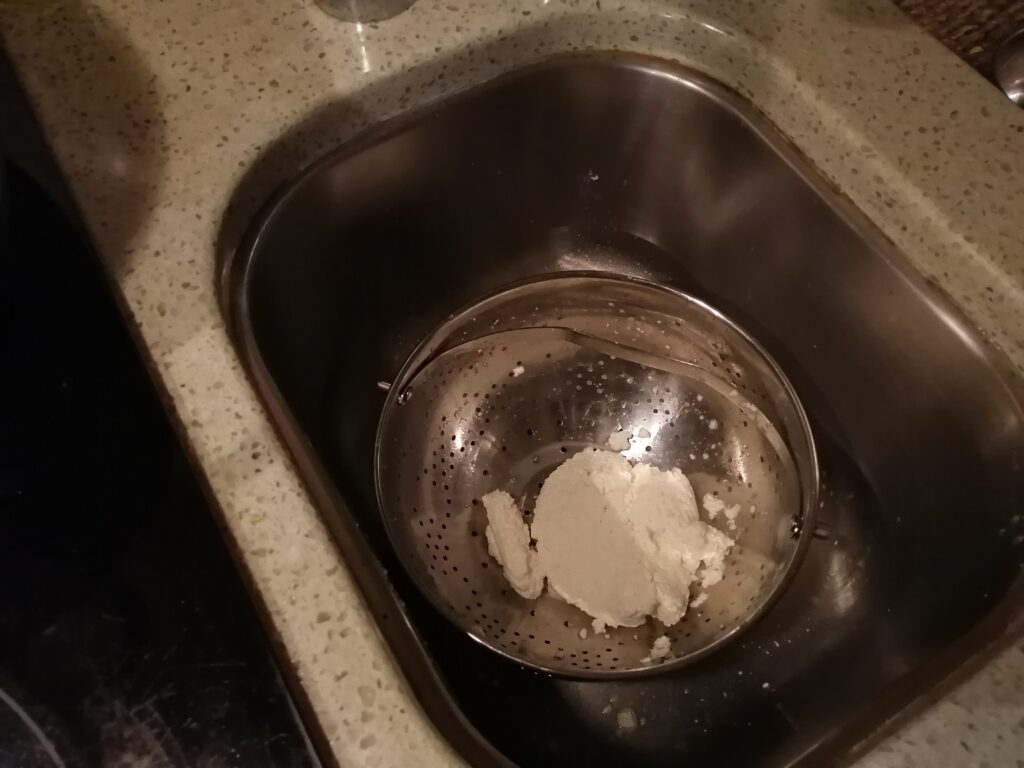
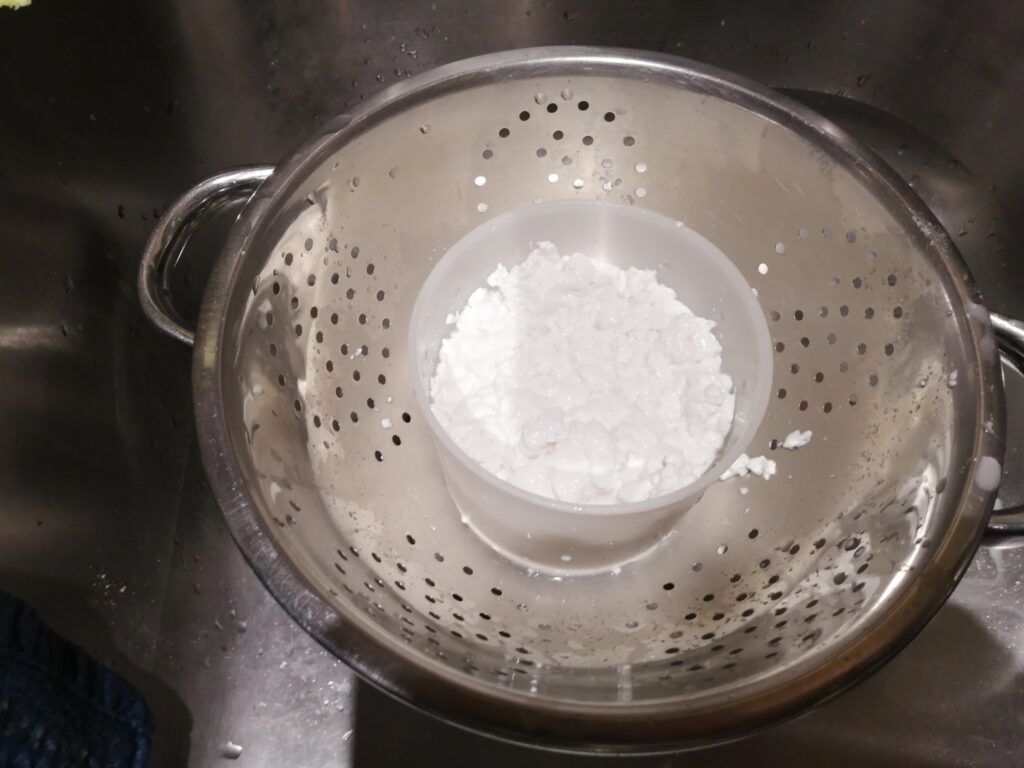
Drained Ricotta
- Stop adding acid and scoop the cheese with the kitchen strainer into the pasta strainer or your cheese mold. You can also pour the entire pan directly into the pasta strainer, just be careful because it will be very hot.
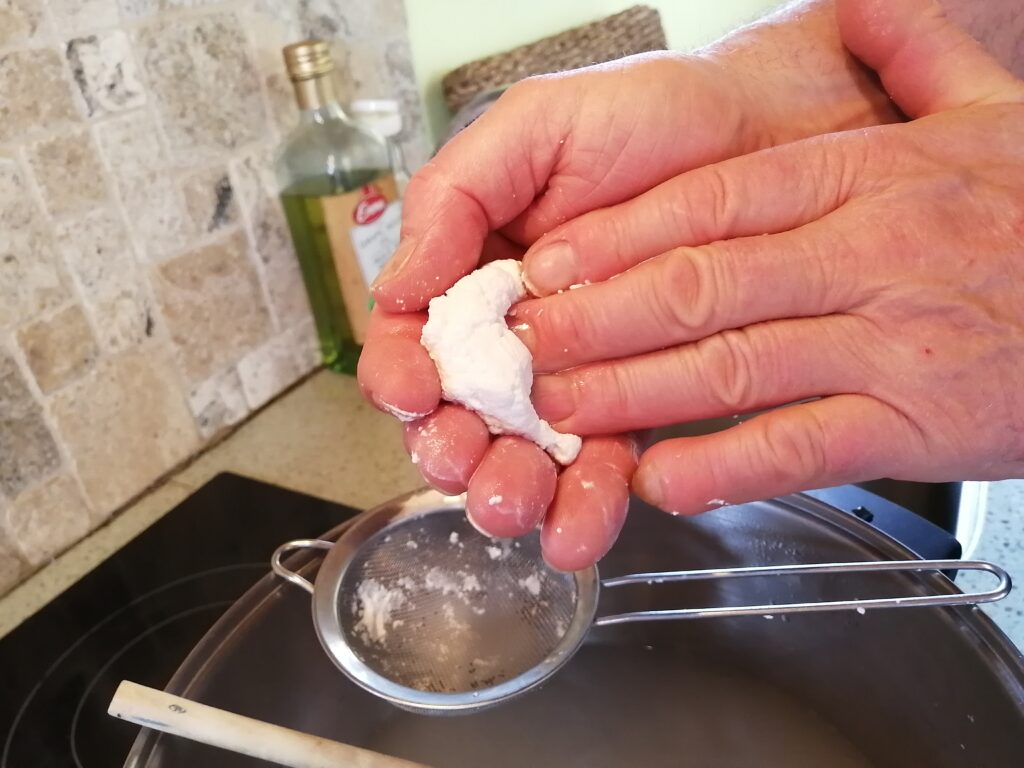
- This cheese will drain very fast and if you prefer a soft Ricotta type cheese, let it drain briefly, maybe 10 minutes, then transfer it into a bowl and into the fridge. If you would like to make a Paneer type cheese, with a firmer texture, just let it drain for a couple of hours before refrigerating.
- This cheese has no added bacteria culture, so it will not age. It is intended to be consumed right away. You can freeze it if you want to make extra for a later use.

Ricotta with fresh herbs
Troubleshoot
- The milk coagulates before you add the acid. This can happen when your milk is not fresh. The older the milk is the more acidic it gets. If this happens, don’t worry about it, as long as your milk tasted fine to begin with, your Ricotta will be fine as well.
- You added a lot of acid and the milk didn’t coagulate clearly. It only made a very fine curd, which can hardly be scooped. This can happen to goat milk. You can pour the curd into a very fine meshed cloth, trying to retrieve as much of the fine curd as possible. This can also happen to milk that came from an unhealthy animal. In the article about “What to know about cheese”, I talk about somatic cell counts. A high somatic cell count can cause this problem in your Ricotta.
- The Ricotta tastes vinegary. You used too much vinegar. Add it very slowly and at the first sign of coagulation, stop adding the vinegar. If you still pick up on the vinegar taste, use citric acid instead.
Cheese Shark Recipe idea for fresh Ricotta
Stuffed Mini Peppers
Ingredients:
- 6 Mini Peppers
- 200g (half a pound) of ricotta
- ¼ cup whipping or table or coffee cream
- One organic lemon
- Parmesan
- Fresh or dried Basil and Thyme, or an Italian Herb Mixture
- Olive Oil
- Salt and pepper

Ricotta stuffed mini peppers
Process
- Cut the mini peppers in half, clean and wash them. Place them on a baking sheet.
- Put the Ricotta into a bowl and add the cream. Whisk well.
- Add fresh or dried Basil and Thyme, or an Italian herb mix, then salt and pepper to taste.
- Grate some lemon peel from the organic lemon.
- Stuff the pepper halves with the cheese mix.
- Gently sprinkle some olive oil over the peppers and grate some parmesan over it.
- Bake for 20 minutes at 200C/395F.
- Let the peppers cool for 10 minutes, then serve.
Enjoy!!!
2. Cheese Shark Homemade Cheese Recipe
Le Chevre Frais or Neufchatel Cheese
This cheese is easy to make and works well with homogenized store bought milk. When you make it with goat milk it is called Le Chevre Frais, if you make it with cow milk it is called Neufchatel Cheese. It is a fresh, soft cheese that is spreadable. It contains starter culture, doesn’t need aging, and can develop a nice flavor within days. It can be frozen or vacuum packed if you can’t use it up within a week.
Any milk works for this recipe. If you use homogenized milk, the cheese will take longer to drain than with non homo milk, but it will have a creamier taste.
Ingredients:
1 L/1qrt Pasteurized and Homogenized (or non homo) milk
2 Tbsp of Buttermilk with active bacteria or ¼ tsp freeze dried starter (link to review)
1 drop of liquid rennet or a rice grain size piece of dried rennet dissolved in ⅛ cup of cold water
Procedure
- Pour your milk into the pot and heat it to 25C/77F, stir well and add half a cup of buttermilk, or ¼ tsp of freeze dried starter culture. Don’t use Yogurt as a starter, it won’t work well with this recipe.
Getting goat milk ready to make chevre
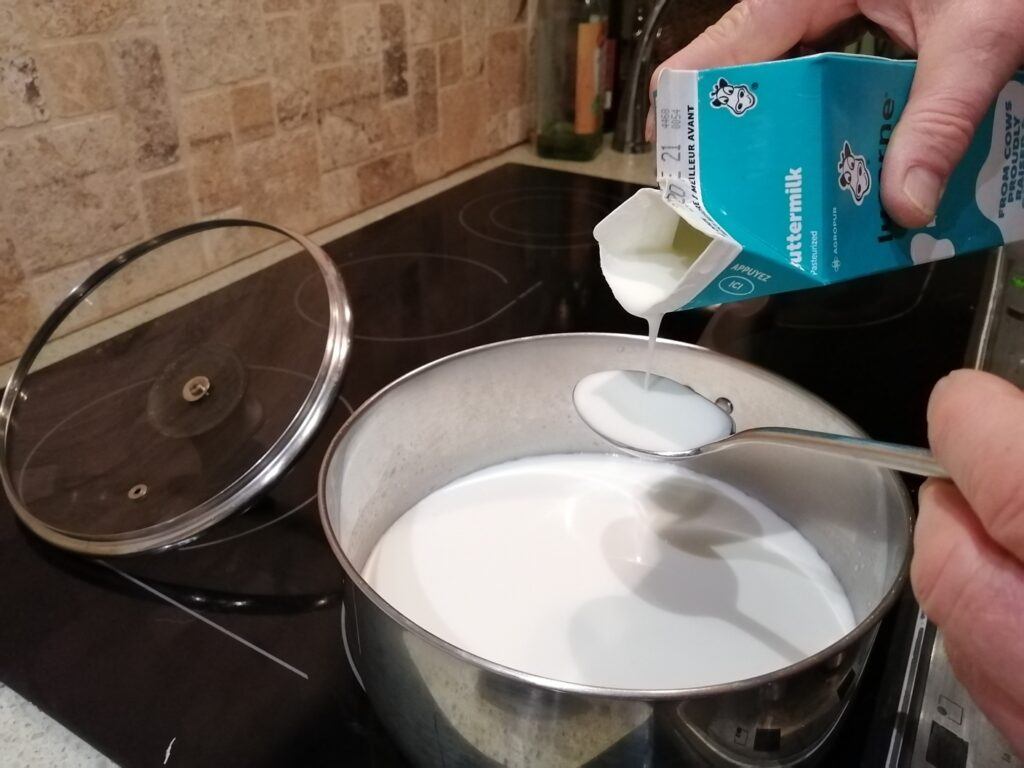
Adding active buttermilk to the lukewarm milk.
- Take the pot off the stove. Prepare half a cup of lukewarm water and add a tiny bit of rennet. If you use liquid rennet, use 1 drop. If you use rennet tablets, break off a rice grain size piece and dissolve in cold water, then stir it into the milk and cover the pot to keep the temperature. Room temperature is fine.
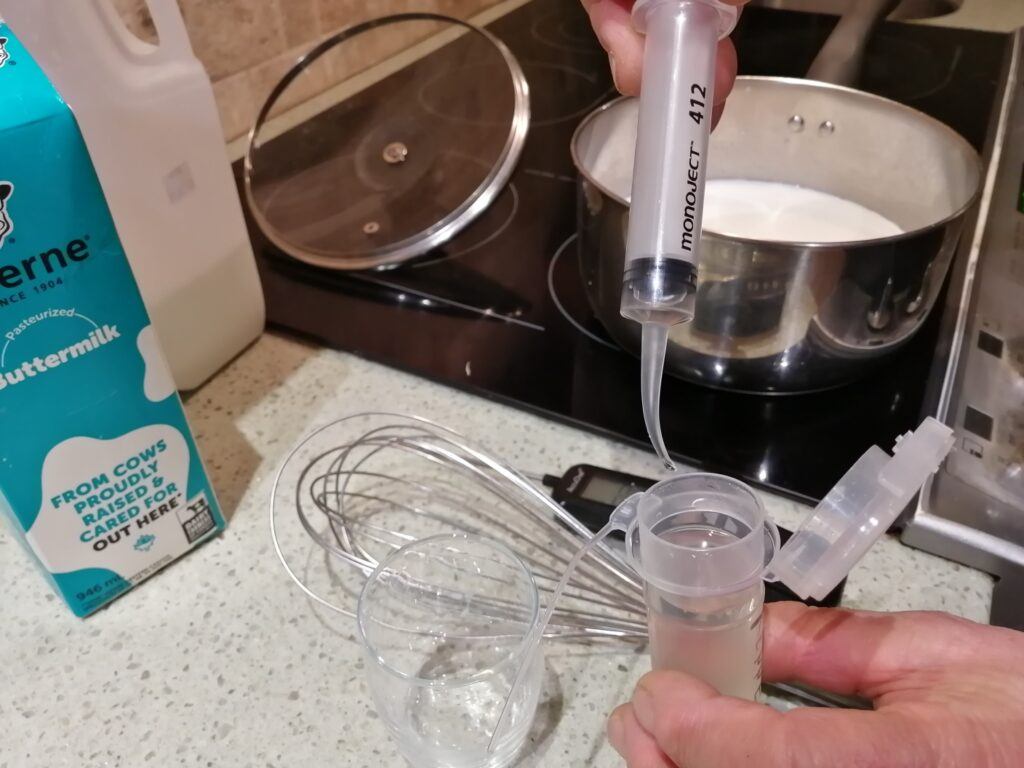
Adding just two drops of Rennet
- It will take the starter anywhere from 10 to 20 hours to acidify the milk. It’s better to wait a little longer than not long enough. I would suggest starting in the morning, and letting the milk, with the buttermilk and rennet in it, sit until the next morning.
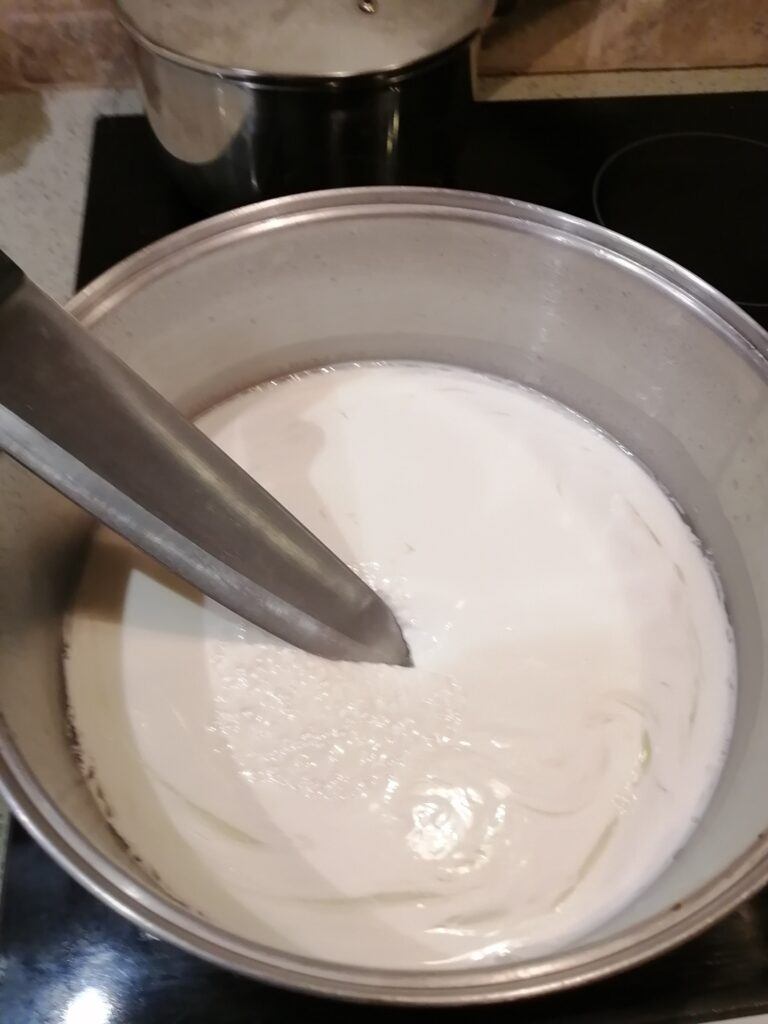
- The next morning the milk should have coagulated. Cow and sheep milk will make a much firmer coagulant than goat milk. It is important to taste it. It has to be sour, like yogurt, you have to pick up the sourness in your mouth. If this is not the case, your starter culture was not active enough.
- Now prepare your cheesecloth. Best is to place a pasta strainer into the sink and drape it with the cheese cloth. Then pour the coagulated and soured milk into your cheesecloth.
The milk has curdled and is ready to be drained.
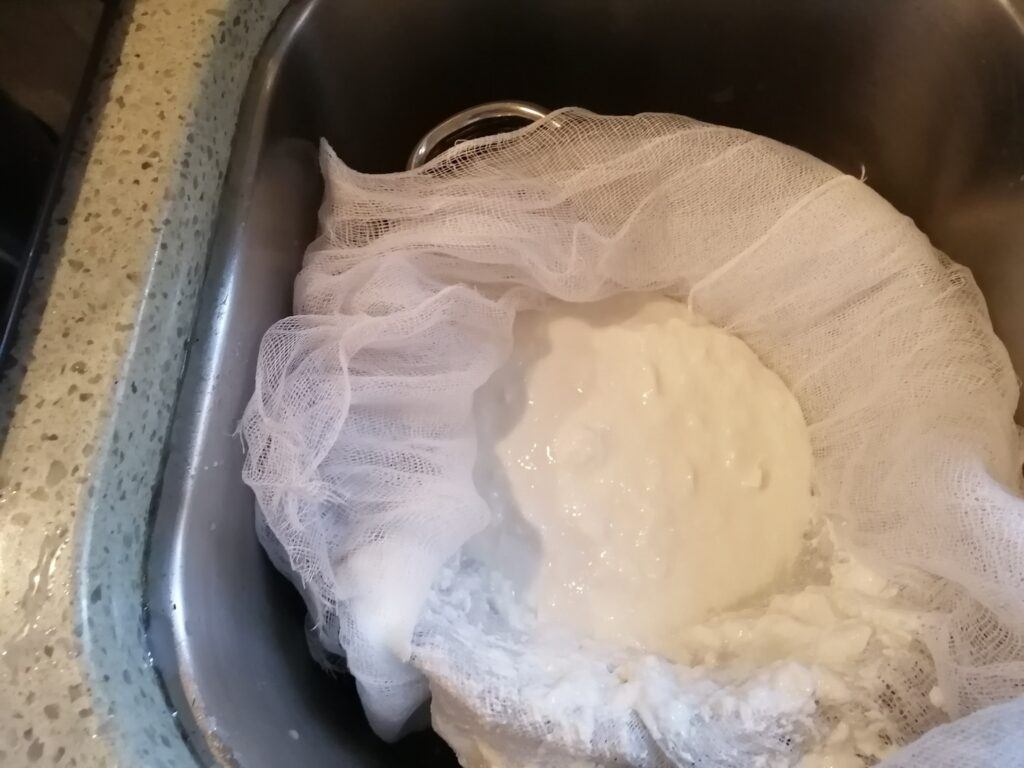
The chevre curd is draining in the cheese cloth.
- The draining will take up to 24 hours, depending if you used homo or non homo milk. Once the cheese has drained for a few hours you can speed up the draining by pressing the cheesecloth. Place a cutting board on it and put weight on it, like a water bottle.
- Once the cheese has drained to the texture of cream cheese, take it out of the cheesecloth and weigh it on a kitchen scale. Then add 1% salt to it. As an example: if the cheese was 440g/1lb, then add 4 g/0.2oz. You can also salt it to your own taste.
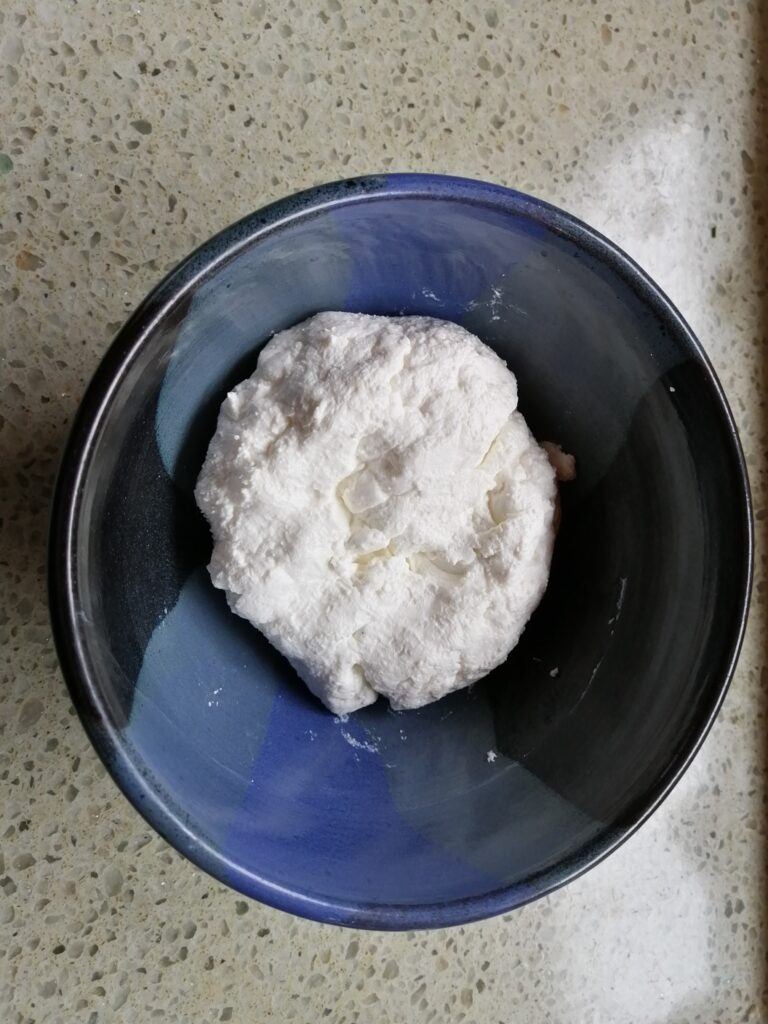
This chevre is ready to consume
This is an extremely versatile cheese. You can make cheesecake with it, use it with crackers, mix it with any spice or sweets like honey. It is great in salad dressings, crumbled over salads, or melted on top of veggies or ham toast.
Troubleshoot
- After pouring the chevre into the cheesecloth it doesn’t drain, even though it made a firm curd. In that case your curd never acidified enough. Reasons for that are that either your culture wasn’t active, your milk was too cold or you didn’t wait 24 hours before draining it. Make sure your milk stays at room temperature. Cover the pot, or place it beside a heater. If you did all that, then it must be your culture. If you used buttermilk, get a fresh bottle with a good expiry date on it, or buy a cheese starter.
- The curd turned sour, but never coagulated. That can happen when your rennet is not active anymore. In this case, you can try to pour the curd into the cheesecloth. If you are lucky you will retrieve some of the curds, but most of it will run through the cloth. Your rennet can lose activity if it is too old, or when it is mixed with chlorinated water.
CheeseShark Recipe idea for Chevre or Neufchatel
Cheese Filled Cherry Tomatoes
Ingredients:
- 20 firm cherry tomatoes
- 3 oz/100g chevre or neufchatel cheese
- 2tsps bread crumbs
- 1tsps finely crushed peanuts
- 1tbsps olive oil
- Freshly ground pepper
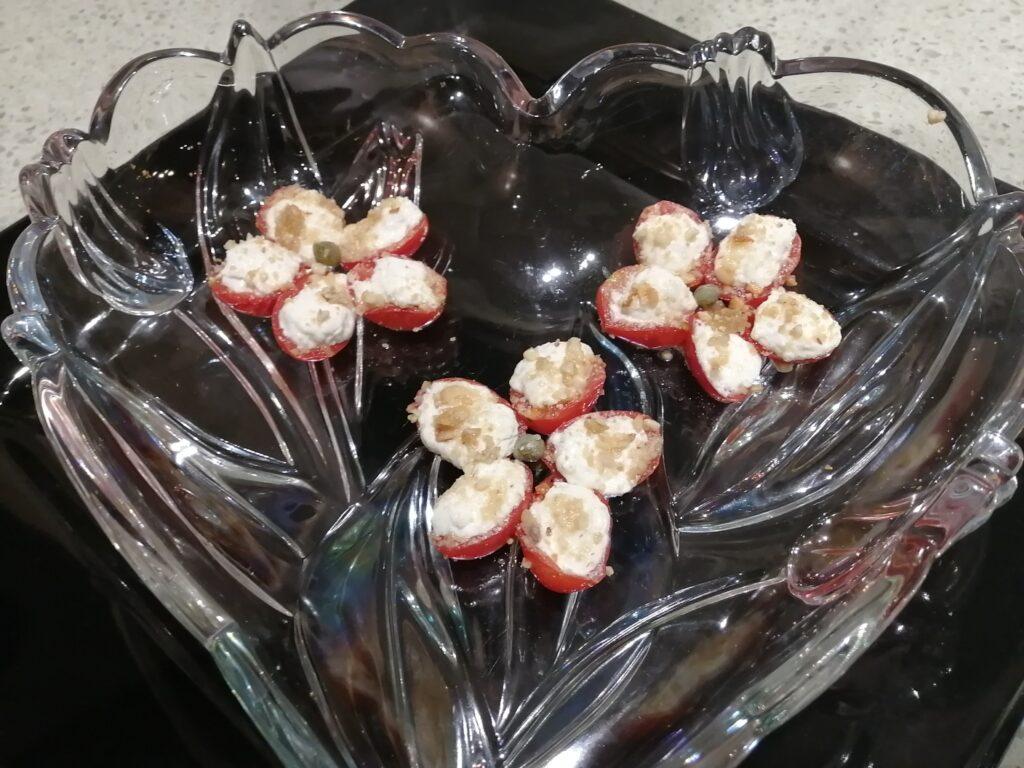
Cheese filled cherry tomatoes
- Cut the stem side of the tomato open with a sharp knife and scrape out the core. With a small spoon, scoop your cheese and stuff it into the hollow cherry tomatoes.
- Place the tomatoes on a baking sheet and sprinkle the bread crumbs and the peanuts over the cheese. Drizzle everything with some olive oil.
- Bake for 15 to 20 minutes at 190C/375F until tomatoes are soft.
- Serve with a spring mix vinaigrette salad and freshly ground pepper.
Enjoy!!!
3. Cheese Shark Homemade Cheese Recipe
Feta Cheese
Feta is really popular and easy to make at home. It’s a great summer cheese, wonderful on salads and pizza.
Ingredients:
4L/1Gal of pasteurized or raw milk ( homo or non-homo) 4 tbsp of buttermilk with active bacteria
2 tbsp of plain yogurt with active bacteria
¼ of a rennet tablet or liquid rennet (according to the suppliers recommendation) mixed in ⅛ cup of cold water.
Procedure
- Pour your milk into a pot and heat it up to 35C/95F.
- Stir in the buttermilk/ starter and the yogurt. Cover the pot and leave it for one hour.
- After an hour, re-heat the milk to 35C/95F and add the rennet. Make sure that the rennet is always mixed with some cold water. Never add non-diluted rennet directly into the milk. Stir the rennet/water mix into the milk, then let the milk sit for 30 minutes.
- After 30 minutes the milk should have coagulated. It should have made a firm coagulant. If this is not the case, wait another 5 minutes.
- Take a sharp knife and cut the coagulant into 1 cm/1/2inch squares. Wait 5 minutes and you will see the whey separating from the curd.
After adding the rennet the milk has coagulated

Cutting the curd into squares

The curd starts to separate from the whey.
- Take the whisk and stir slowly, further cutting up the curd. Once the curd is cut into corn size pieces and once the curd clearly separates from the whey, let the curd sit for 90 minutes.
- Ideally the curd should keep its temperature. You can either cover the pot with a blanket, or use a heat blanket. The “warm” setting in your oven might work as well, just make sure the curd doesn’t get any warmer than 38C/100F. You can also heat up the curd after 40 minutes to 35/95 again, stirring it gently.
- The curd is now heavier than the whey and will settle to the bottom of the pan.
- After 90 minutes the curd will have firmed up a lot. Notice the difference from when you first cut the curd to now. Place the mould into a pasta strainer and scoop the curd out of the pan into the mould. Put 1L/1qrt of whey aside. You will need this later to make a brine.
- You can also carefully pour the entire pan into the mould, just go slow and give the whey time to flow off. Make sure to keep the whey, if you intend to brine the feta after, see below.
- Flip the mould every two hours, so it becomes nice and even. Let it sit in the mould at room temperature for 20 hours. Let the whey sit at room temperature for the same amount of time.
The curd has settled to the bottom of the pan
The curd drains in the mold

Flipping the mold will make an even looking cheese.
- The draining time depends a lot on the type of milk you are using and also on how active your culture is. The feta should be firm and well formed before removed from the mould. You can’t go wrong by leaving it in the mould longer. It’s better to leave it in there too long than not long enough.
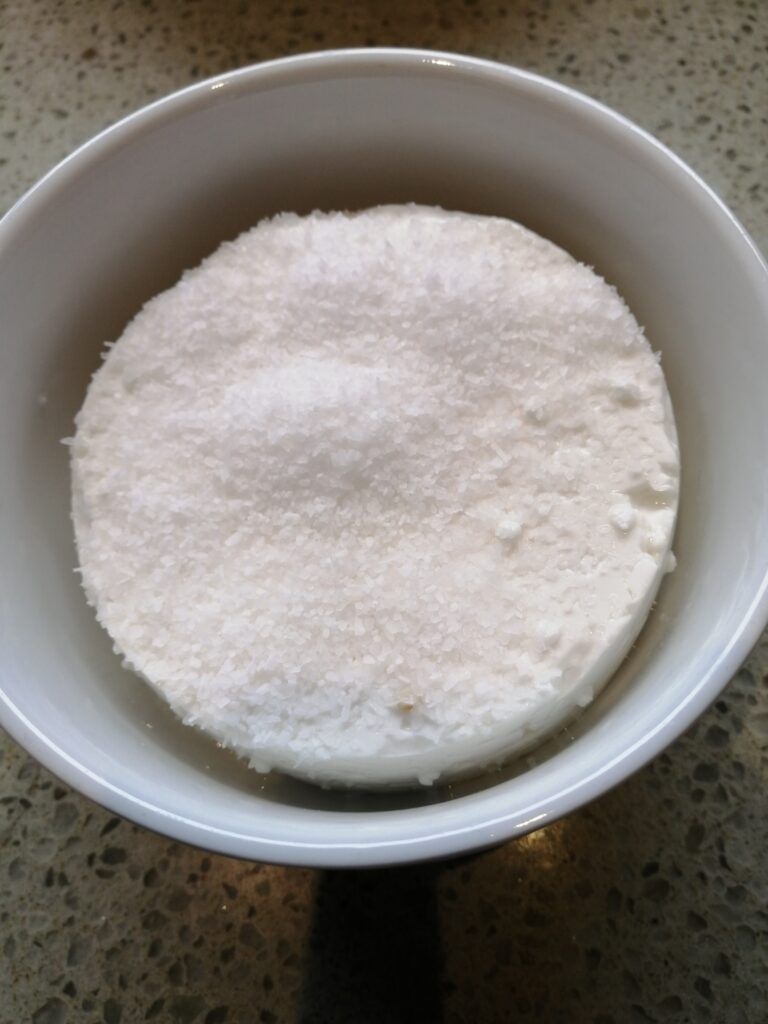
- Now we need to salt it. Feta is a salty cheese. There are two options:
1. Dry Salting: Place the cheese puck into a bowl and generously sprinkle salt over it. Make sure the entire cheese is covered in salt. After a day, place the feta into a zip lock bag or a tupperware container and refrigerate it for 2 days. If you consume it right after salting, you will find that the outside will be very salty and the centre will have hardly any salt. After 2 days the Feta will be ready to eat. You can adjust the saltiness by salting it longer, or less than a day.
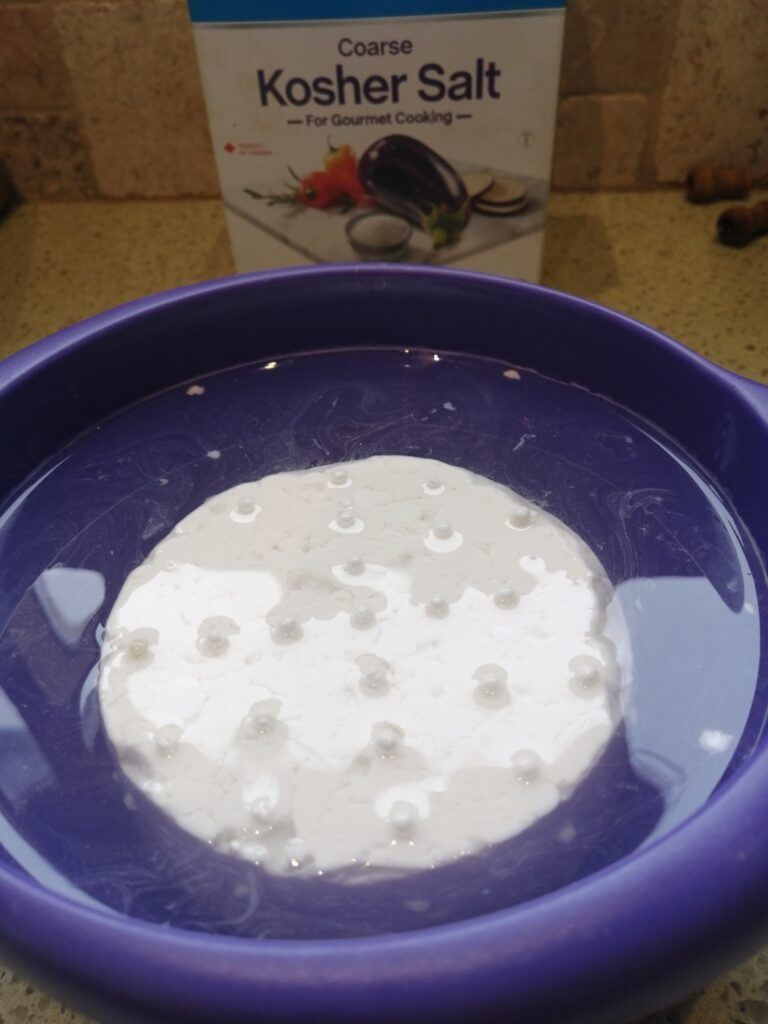
Brining: You can also salt your feta in the brine. Fill 1L/1qrt of whey into a bowl then add 6 Tbsp of salt. Stir well until the salt is dissolved. Place the cheese puck into a tupperware and fill it with the brine. Make sure the cheese floats. Cover the tupperware and place it in the fridge. After 2 days the feta will be ready to consume, However; if you wait a week or even longer it will get better and better.
In this brine you can leave the feta for many months.
Troubleshoot
- After adding the rennet, the milk did not coagulate. That can happen when your rennet is not active anymore.Your rennet can lose activity if it is too old, or when it is mixed with chlorinated water. This could also happen if your milk was too hot. Make sure your thermometer is accurate.
- After pouring the curds into the mould or cheesecloth, it hardly drains, the cheese stays liquid. That can happen if your culture is not active and the curd never started to acidify. You can try to salvage the cheese by pressing it and just giving it 2 to 3 days time to drain. Make sure to use an active starter, and an accurate thermometer.
- After brining the feta in a salty brine, the cheese is slimy on the outside. This can happen if your cheese didn’t acidify enough. Make sure to keep the cheese warm after it drains in the mould. It could also be that your brine wasn’t salty enough or not acidic enough, which happens if you used water instead of whey to make the brine.
Cheese Shark Recipe idea for Feta Cheese
Feta and Chile Popovers
Ingredients:
- 1 cup all purpose flour
- ¼ tsp salt
- 2 eggs, beaten
- 1 cup milk
- 1 tbsp melted butter
- 2 serrano chiles, seeded and finely chopped
- 3 oz/100g feta cheese, crumbled
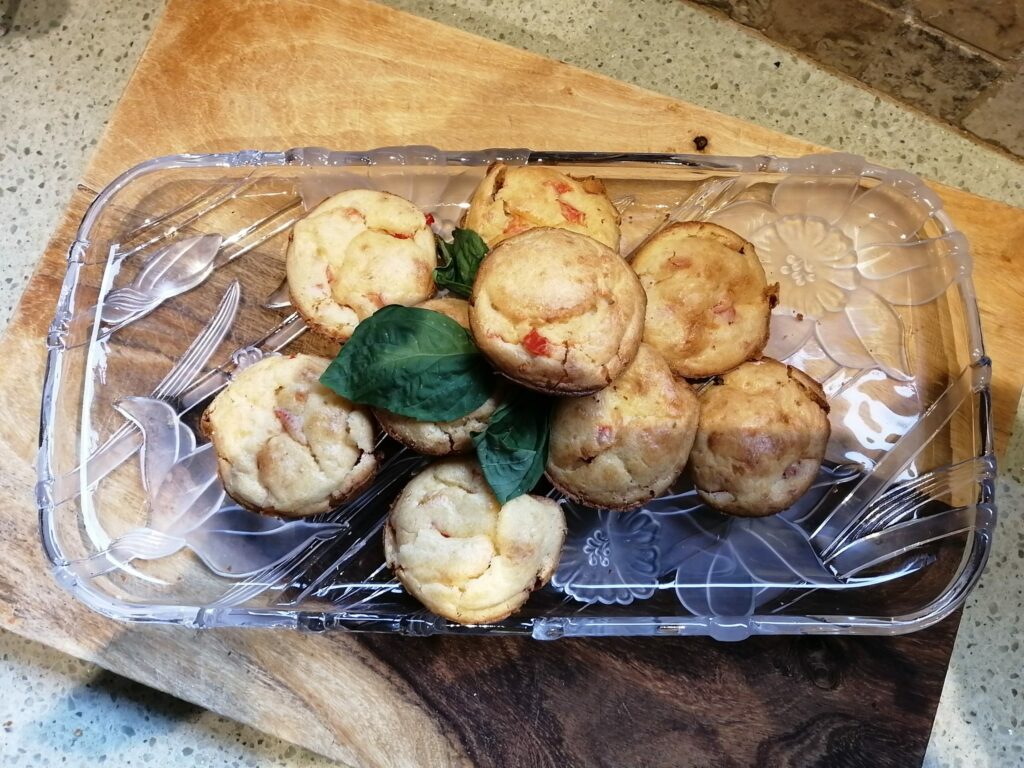
Feta Popovers
- Grease 12 muffin cups with butter and dust with flour.
- In a bowl, mix flour and salt. In another bowl mix milk, eggs, and the melted butter.
- Combine the liquid with the dry ingredients and stir gently. Then add the chile and the feta cheese.
- Pour the batter into the muffin cups to make them about two thirds full.
- Bake for 15 minutes at 245C/475F, then reduce heat to 175C/350F and bake another 20 minutes. The batter should double in size and should be slightly browned.
Enjoy!!!
4. Cheese Shark Homemade Cheese Recipe
Fresh Mozzarella
As an introduction please read my article about Mozzarella Cheese.
Mozza is one of the most consumed cheeses worldwide, especially because of its commercial use on Pizza. This Mozza recipe will make a Mozza that can be consumed right away.
The Mozzarella curd needs to be stretched or pulled. In order for the stretching to work, the acidity of the milk needs to be lowered to an exact pH level. Since most home cheese makers don’t have a pH meter, it is very important that you follow the EXACT instructions.
Homogenized milk doesn’t stretch as well as non-homo milk. Homo milk still makes a good Mozza, but if you have access to a non – homo milk, that would be preferable.
I will give you two options to adjust the acidity. One is with citric acid and the other is with white or apple cider vinegar. Use the exact amounts of milk and acid from this recipe. It is based on 2L/2qrt of fresh milk. If you use 4L/1gal, you can multiply the amount of citric acid or vinegar by two.
It is important that you use an accurate thermometer. When we stretch the curd it needs to go into hot water first and the temperature of the hot water needs to be exact.
Mozza is a lot of fun to make, especially once you figured out the stretching. The challenge is that the pH or acidity level of the milk, and later the curd, has to be accurate for the stretching to work. Without a pH meter this can involve a bit of a guessing and experimenting. The good news is that even if the stretch doesn’t work 100%, you will still have a decent cheese. Making a good Mozza will take a bit of practise. As always, if you have questions leave them below in the comment box, I am happy to help.
Ingredients
- 2L/2qrt Milk, raw or pasteurized, homo or non-homo, whole or partly skimmed
- Half a teaspoon of Citric acid diluted in ⅛ cup of cold water or 40g/1 ¼ fluid oz of white or apple cider vinegar
- ⅛ of a rennet tablet mixed in ⅛ cup water or 10 drops of liquid rennet mixed in ⅛ cup water.
- 1 bowl of salted cold water. Use 2 tbsp per 1L/1Qrt of cold water.
Procedure
- Heat the milk to 32C/90F stirring well.
- Add the citric acid or the vinegar. Add it slowly and stir intensely.
- Add the rennet, stir for 10 seconds then stop the milk from moving. The milk should coagulate in 10 to 15 minutes, if it takes longer, just wait. If you used liquid rennet, be aware that they come in different strengths and you might need to find out how much to use.
- Once the milk has coagulated, cut it into 1 inch squares with a kitchen knife. Then use a whisk to break the curd apart. Then use a ladle to stir the curd until it starts to clearly separate from the whey.
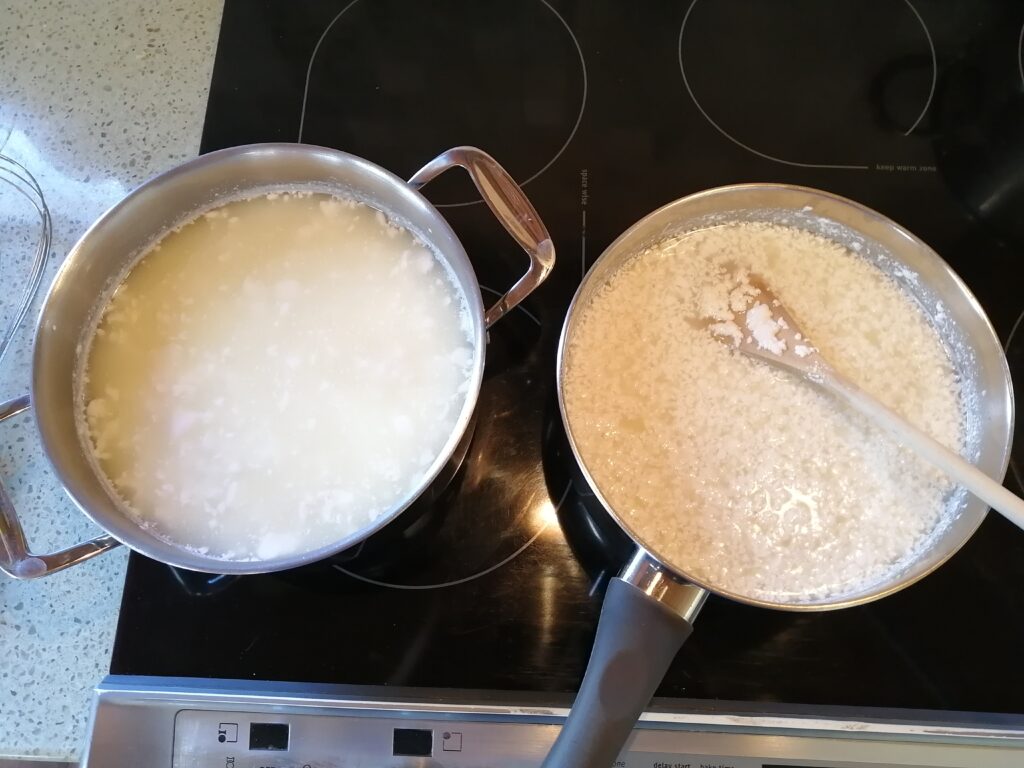
On the right fresh cut curd. On the left, after 10 minutes the curd sets to the bottom of the pan.
Drained Mozza, ready for stretching
- Slowly heat the curd to 41C/105F, stir well, but gently. Once it has reached the temperature, let the curd sit for 10 minutes.
- Line a pasta strainer with cheesecloth and pour the curd into the cloth. The whey should drain away quite fast. You can squeeze the cheese cloth to speed up the draining.
- Once the curd takes shape you can remove it from the cloth and place it into the pasta strainer.
- Prepare a pan with about 2L/2qurt of water and heat it to 80C/176F. Place a kitchen strainer over the pan, then cut a piece off the curd and place it into the strainer.
- Submerge the curd with the strainer into the hot water, while moving it around. Stick the thermometer into the curd and remove it once it has reached 57C/135F.

Hot water on the right and cold water on the left. Mozza cut in slices ready to be stretched.
Submerging the cheese into the hot water for about 30 seconds.
Placing the cheese into the strainer.
working the hot cheese mass with a ladle.
- Use a ladle to knead the hot curd in the strainer for a few seconds, then put it into your hands and work it until it develops a plasticity. Form a ball and place it into the salted cold water.Repeat until all the curd has been processed. Leave the Mozza balls in the cold brine for 2 hours, then they are ready to eat.
Working the Mozza mass with your hands.
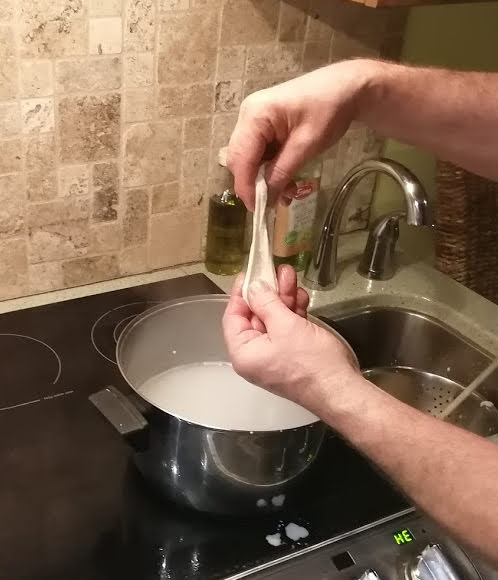
Stretching the hot Mozza

Rolling the Mozza mass into a ball.

Dropping the Mozza balls into salted cold water.

Mozzarella balls after stretching in a light salty brine.
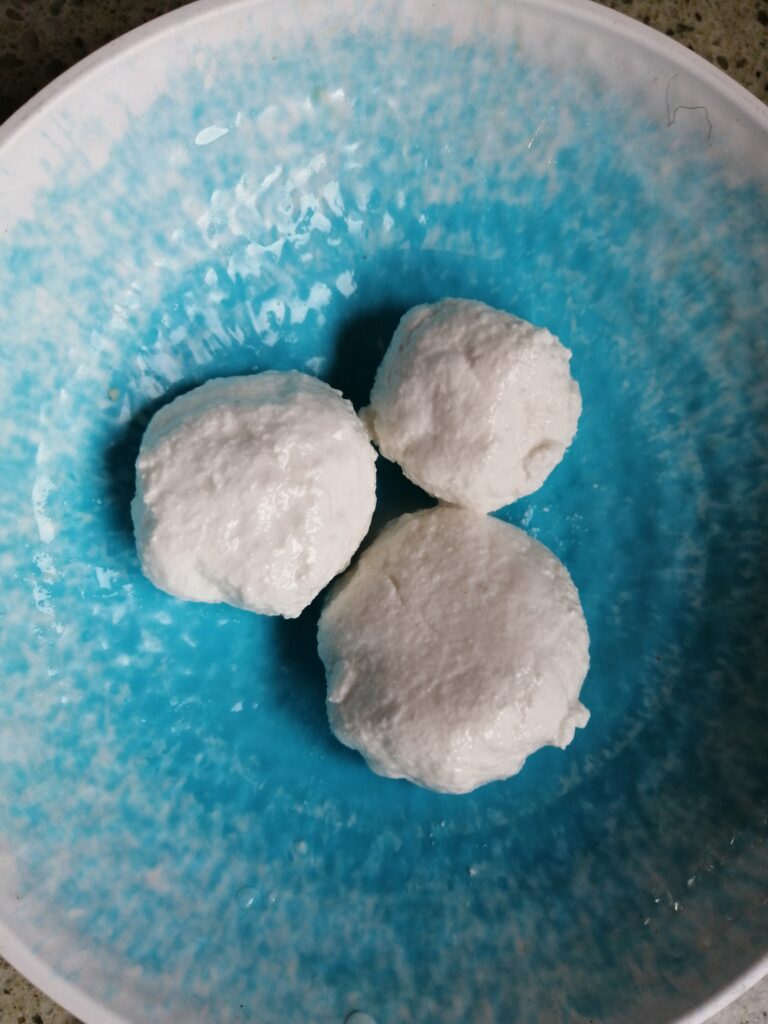
Ready to eat Mozza balls
Troubleshoot
- The milk curdled as soon as you added the acid. This can have two reasons. You either added too much acid by using a big teaspoon, or your milk was not fresh and had a lower acidity to begin with. Use a real teaspoon measuring cup and use fresh milk. If you can’t access fresh milk, then reduce the amount of acid.
- After adding the rennet, the milk did not coagulate.This can happen when your rennet is not active anymore.Your rennet can lose activity if it is too old, or when it is mixed with chlorinated water. This could also happen if your milk was too hot. Make sure your thermometer is accurate.
- After adding the rennet, the milk turned into a flaky mass. This can happen when you use too much acid. You can still make Mozza with this, next time remember to use a bit less acid.
- The curd was really crumbly and was difficult to turn into a ball before stretching. In this case you used too much acid. You can still make a decent cheese with it, but next time cut back a bit on the acid.
- The curd didn’t stretch well and didn’t develop plasticity. There are 3 reasons why this could happen. 1.You either used too much or not enough acid. 2. Your water wasn’t hot enough. 3. you didn’t leave the curd long enough in the hot water. If your curd was slightly dry and hard to form a ball with, you used too much acid. If your curd was very moist and you had a hard time draining it, you didn’t use enough acid. Always make sure your thermometer is accurate. It is a good idea to have 2 thermometers to compare the accuracy of temperature.
Cheese Shark Recipe Idea for Homemade Mozzarella
Tomato Mozzarella Salad
- 2 ripe medium tomatoes, thinly slices
- 2 large fresh Mozzarella balls, thinly sliced
- 1 medium white onion, chopped
- Extra virgin olive oil
- Balsamic vinegar
- Balsamic reduction
- Fresh Basil leaves, whole or chopped
- Salt and pepper to taste

Place the tomato slices on a plate and add the Mozza slices. Add the chopped onion. Drizzle olive oil and balsamic vinegar over it. Decorate with some balsamic reduction. Add pepper and salt to taste. At the end add the Basil.
Enjoy!!!
Are these instructions helpful? Please let me know how your cheese making is progressing.
This is a great article. I don’t eat dairy. But, I have several friends who live “off the grid” that might really benefit from making cheese at home. The recipes are greatly detailed for first time cheese makers. Even someone who doesn’t often cook, can easily follow these recipes to make their own cheese. The pictures look so good. I love cheese, but dairy makes me so ill. I also that you included a troubleshoot section. I know if I were the one making cheese, I’d most definitely need it.
Hi Erika, thanks for your feedback! Thanks for passing my site on to your friends. If you are interested in why dairy makes some people feel sick read my blog about dairy intolerance and allergies:
https://thecheeseshark.com/what-is-milk-intolerance-what-is-cheese-intolerance-and-what-is-a-cheese-allergy/
all the best!!
CS
Oh my, this post is amazing!!
My daughter is going to love this. She makes so many homemade things including paneer. She’s going to have fun with these recipes.
I love cheeses of all types, and for some reason, I can tolerate goat cheese the best.
Your recipes look very detailed and easy to follow. Much appreciated!
I love your entire site, and I’m bookmarking it.
Cheers,
Suzanne
Thank you Suzanne for your feedback! That was so motivating for me. I’ll keep working to have weekly posts and recipes up. thanks! Check out our recipe site for homemade cheese.
I have always wanted to try this. Thank you s much for sharing. This is a great activity for self-quarantine.
Thanks for your feedback, Catherine! Check out our recipes site for homemade cheese.
You did a great job! I believe that this is the information that can’t be find on the web easily and you decided to share it with others for free, that’s really great!
I didn’t know much about how to make cheese at home but I’ve been always interested to know more about this topic (especially these days that we can’t go out much) and your comprehensive guide helped me a lot. I don’t know if you wrote this post 100% by yourself or got help from other sources as well, anyway, it has really brilliant information which convinced me to share it with my friends on social networks.
I think, the Internet needs more quality posts like yours these days, especially when we see a lot of crappy ads and scams about this topic. You can’t read a post easily on a website without seeing tons popups but your site and post is an ideal example of a quality article which is not covered by annoying ads, has very useful information and lets readers enjoy reading every piece of it.
Thank you again and I wish you continue providing such that quality information in the future which turn the Internet and blogs into a better place to surf!
Best,
Ali
Hi Ali, thanks a lot for your feedback! Yes, i made the content all myself. I have been making cheese commercially for the past 30 years and it’s fun to teach people how to make it at home. All the best!